Applications Menu#
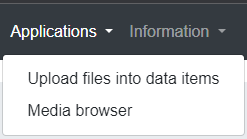
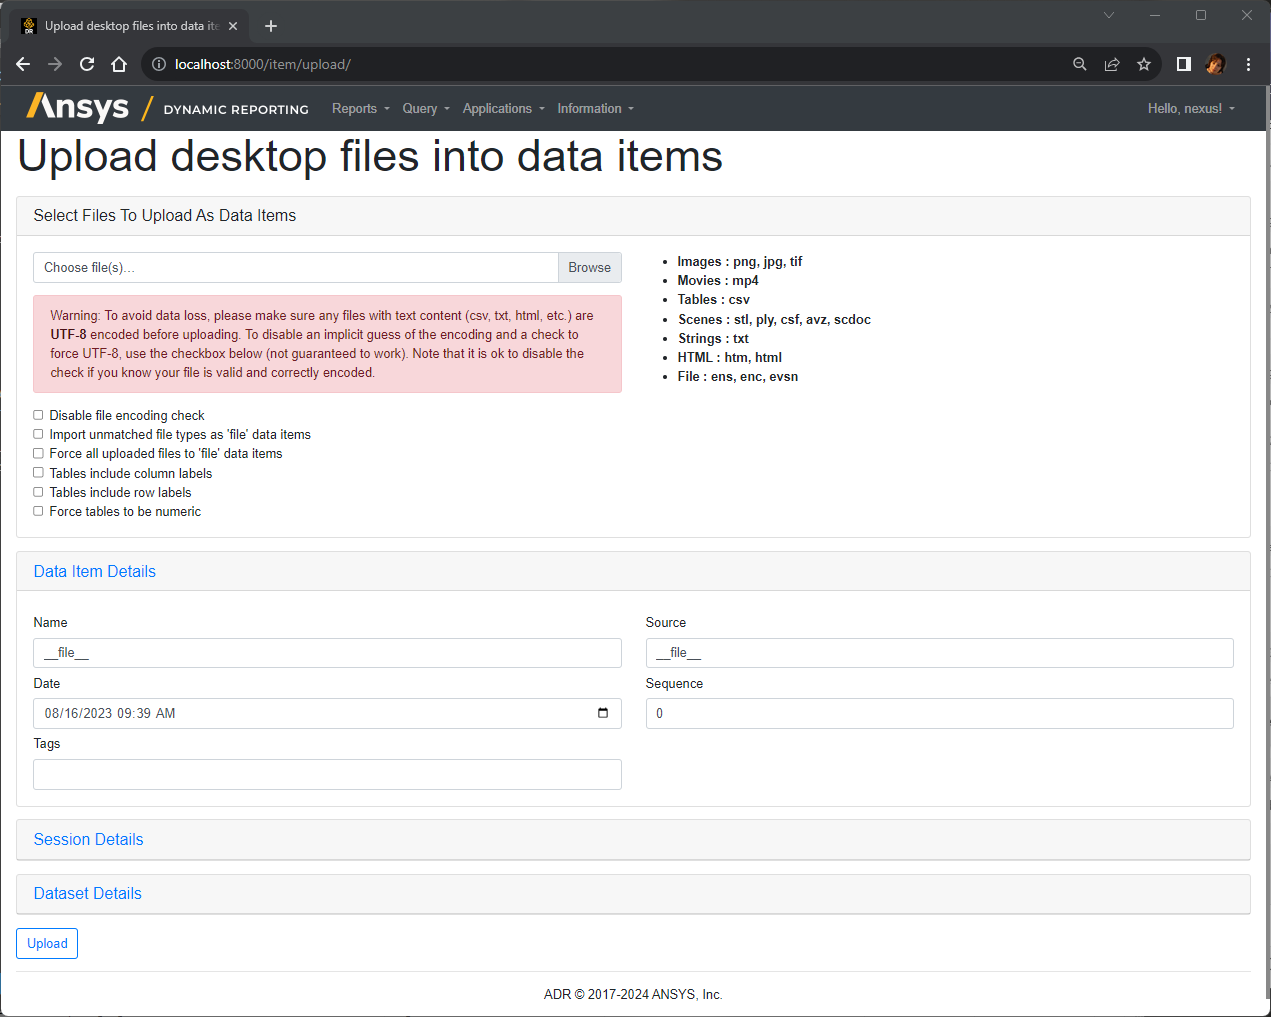
Upload files into data items—only for logged in users#
This menu entry allows users to upload a file and directly place it into the Ansys Dynamic Reporting database.
Media Browser#
The Media Browser is a modern alternative to uploading physical media files through the ADR Nexus web interface. Although it currently only supports local storage, it is designed with the future integration of various cloud storage providers in mind.
Listing files#
The most basic feature provided by the Media Browser is file listing. It acts as a single point to view all physical media files stored on your storage backend. Currently, only local storage is supported which means these files are loaded from the path specified by CEI_NEXUS_LOCAL_MEDIA_DIR, which is the root media folder. By default, all available media files are listed under the media folder.
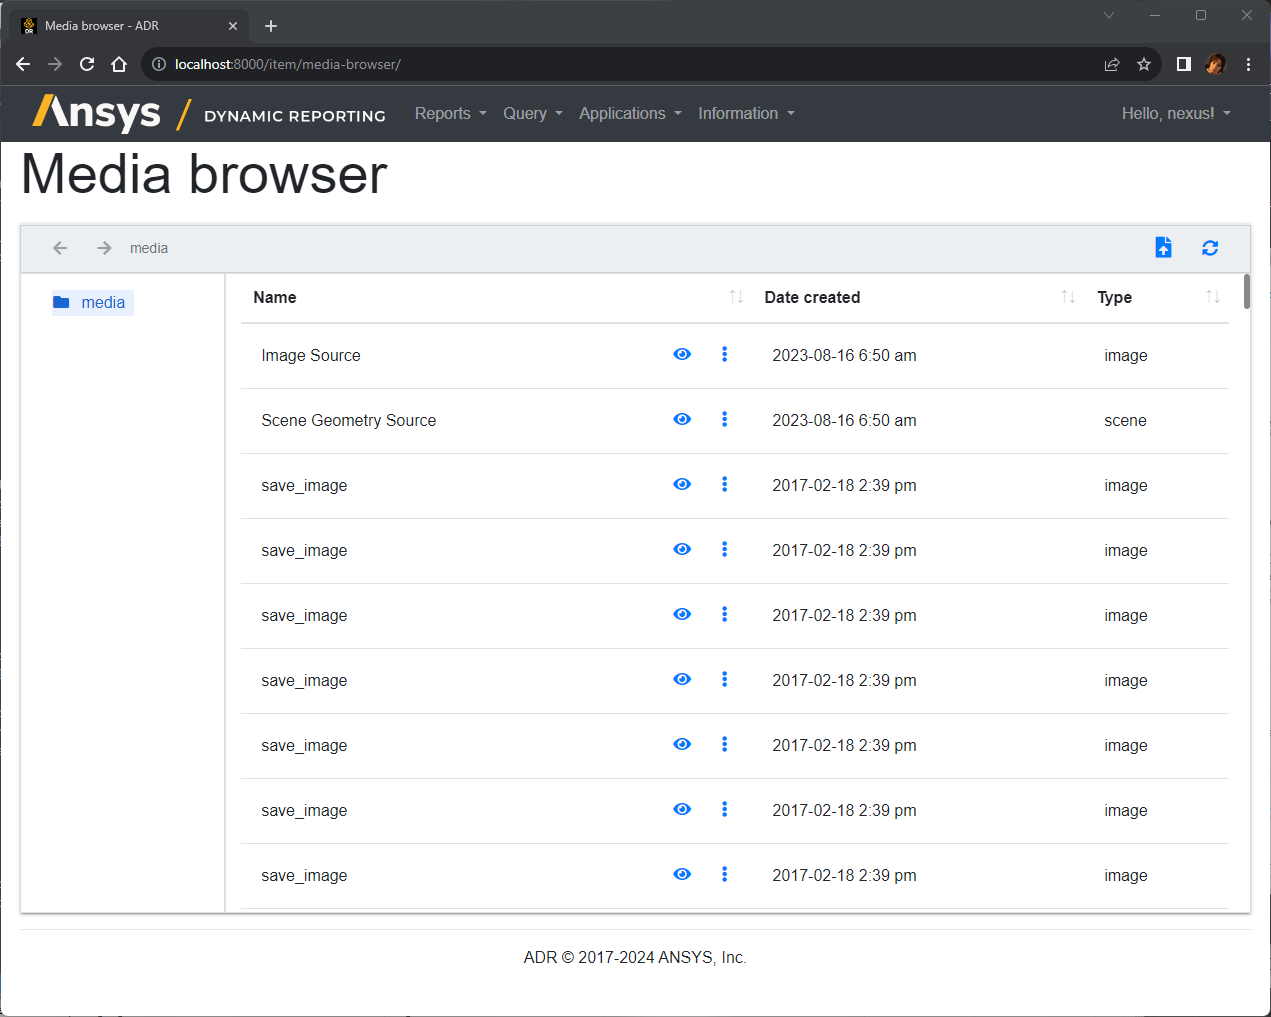
The Refresh button on the top right corner can be used to refresh and obtain the most recent list of files.

Managing existing files#
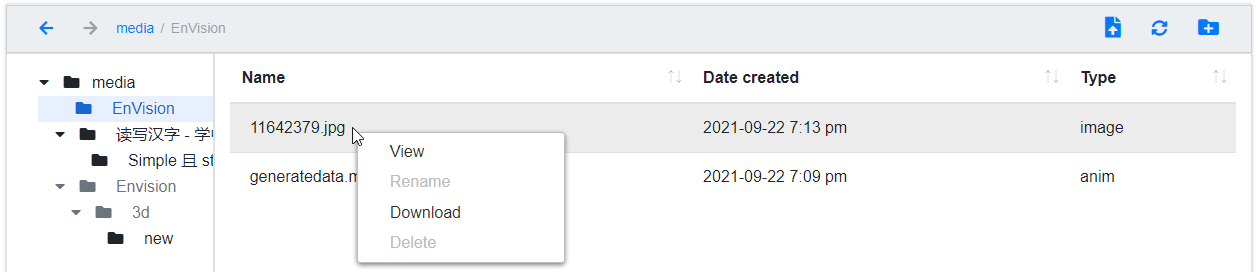
Media files can be viewed, renamed, downloaded or deleted using the right-click context menu. Right click on any file in the list to open this menu.
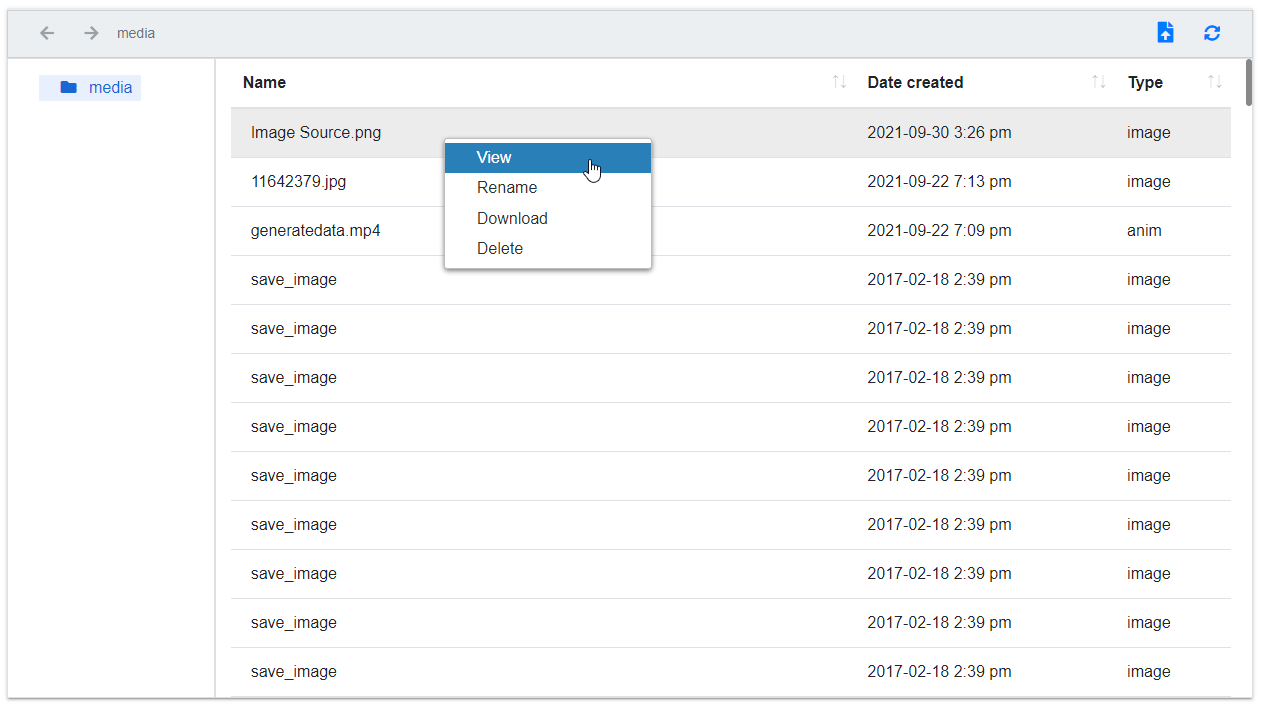
View will open the file details in a new tab. Rename will let you rename the selected file. Give a new name and then hit Enter to save. Download will download the file onto your local machine. Delete will delete the file from the physical storage and refresh the file list.
Uploading new files#
Just like any other cloud storage provider, the Media Browser provides the ability to upload media files. The destination of these uploads is wherever you choose. Currently, only local storage is supported which means these files will go to the path specified by CEI_NEXUS_LOCAL_MEDIA_DIR, which is the root media folder.
To upload a file, click the Upload button at the top right corner.

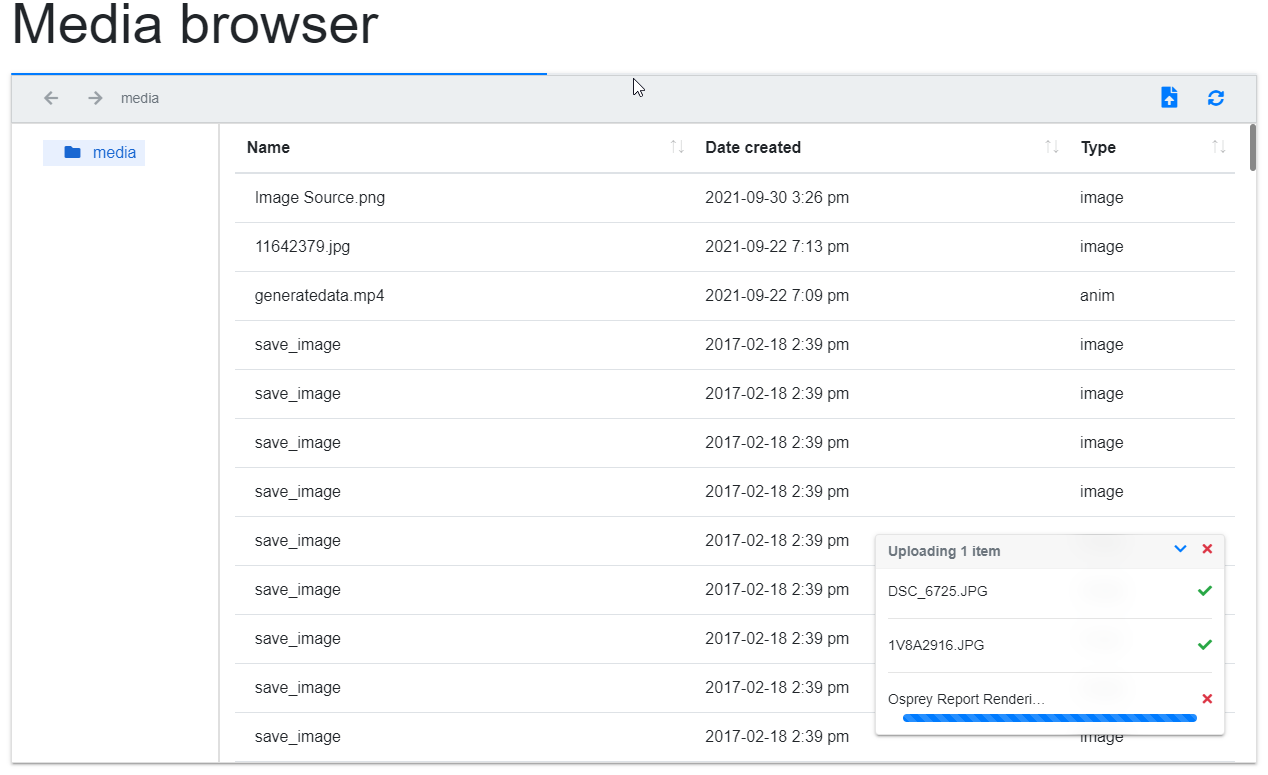
This will open up your browser's file picker dialog with a list of files filtered by allowed extensions. Only a restricted set of extensions are currently supported. Choose one or more files and then click Open. This will bring up a floating window showing the upload progress. You can upload more files as the current upload is in progress. Notice that the order in which you add the files does not matter. Files are uploaded asynchronously and the smaller files take less time than the larger ones. As the files finish uploading, the file list will refresh and the newly uploaded files will appear in the list.
Also, the default maximum upload size is 5000 MB. The environment variable NEXUS_MAX_UPLOAD_SIZE is no longer supported. Use the ADR Nexus launcher CLI, GUI or the launch_local_database_server() Python API.
The Close (X) button next to the file names can be used to cancel an upload in progress. In order to cancel all uploads use the Cancel all (X) at the top of the floating window. The Minimize button next to Cancel all can be used to expand or collapse the window.
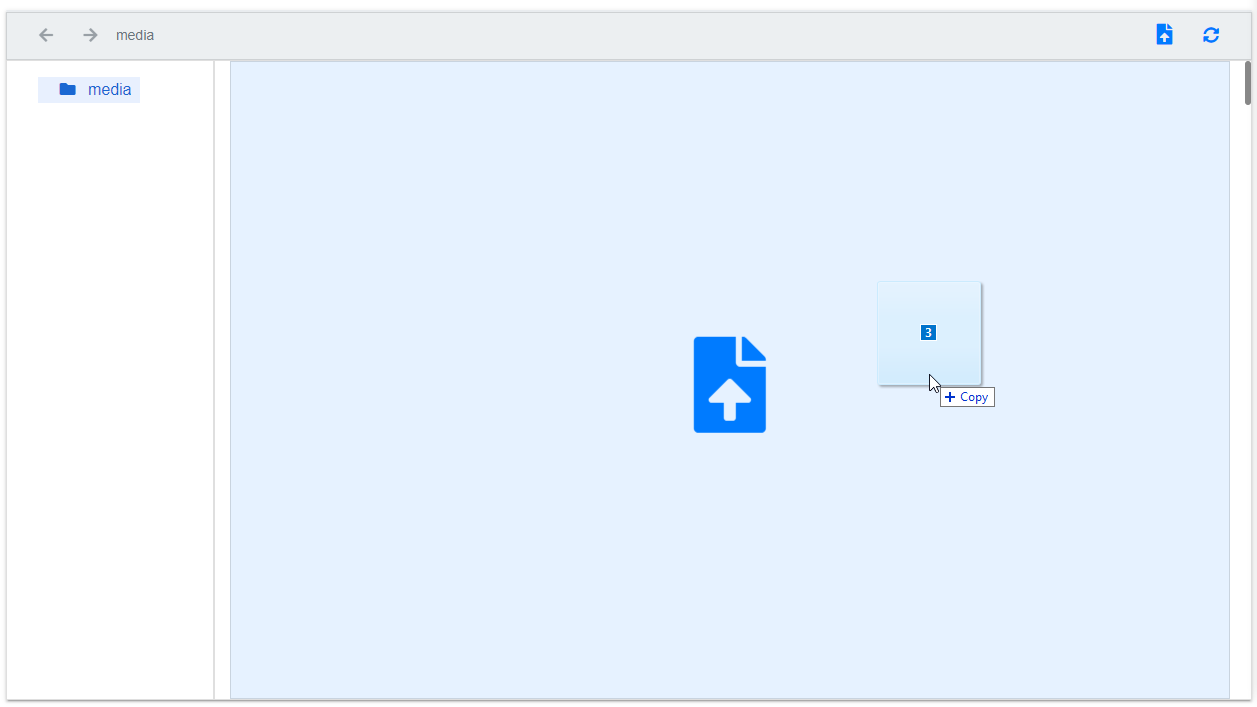
You can also upload by dragging and dropping files on the right pane containing the file list. You will see a prompt when you drag the files over. Drop the files now to upload.
Folders#
Folders in the Media Browser are a logical way to organize files and behave differently than physical folders on your hard drive. In order to enable folders, ACLs must be enabled. Once you've enabled ACLs, any list of files that are displayed are filtered by user permissions.
Unlike physical folders, creating a folder will not create one in your physical storage. Instead, the existing concept of Item Categories is reused. Each folder is nothing but an Item Category that is stored in the database. View the ACLs documentation for more information.
When you click on a folder, all the files "stored" in it will be displayed. In other words, all the items linked to that Item Category will be listed. Since an item can belong to more than one category, a file can also be linked to more than one folder.
Instead of listing all available media files like in the previous sections, the media root folder will only list files that do not belong to a folder, i.e do not have an Item Category assigned to them.
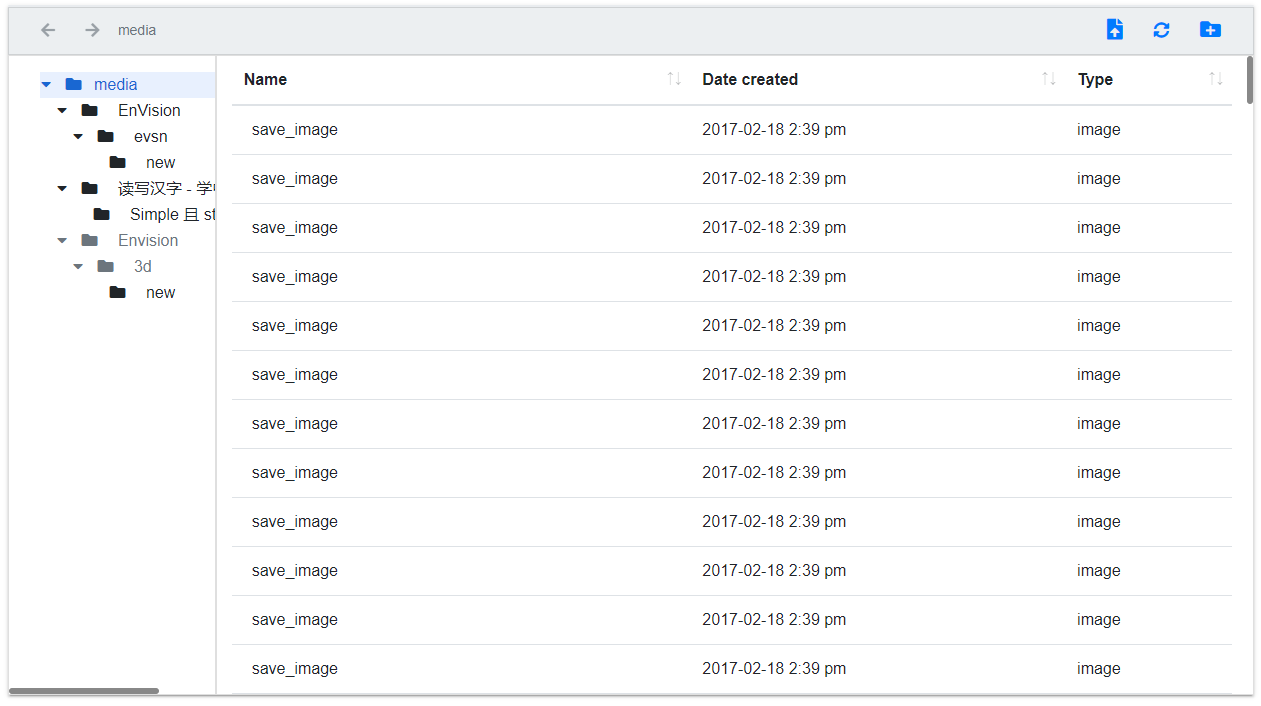
Expand the folder tree by clicking on the caret next to the media root folder.
All item categories that were previously created will show up as folders on the left pane of the Media Browser. Folder names must adhere to naming conventions: Allowed characters are a-z, A-Z, 0-9, '.', '_' and '-' . They may contain an optional / or space in between. If the name is invalid, you will see a warning when the folder tree is loaded and the invalid ones will be ignored from the tree.
As you can see from the example above, international strings are also allowed.
In order to create a folder (i.e an Item Category) from within the Media Browser, click the New folder button at the top right corner.

This will open up a dialog. Enter a name and click Create. Let us call it "demo".

A new folder will be created at the top most level, as a child to the root media folder.
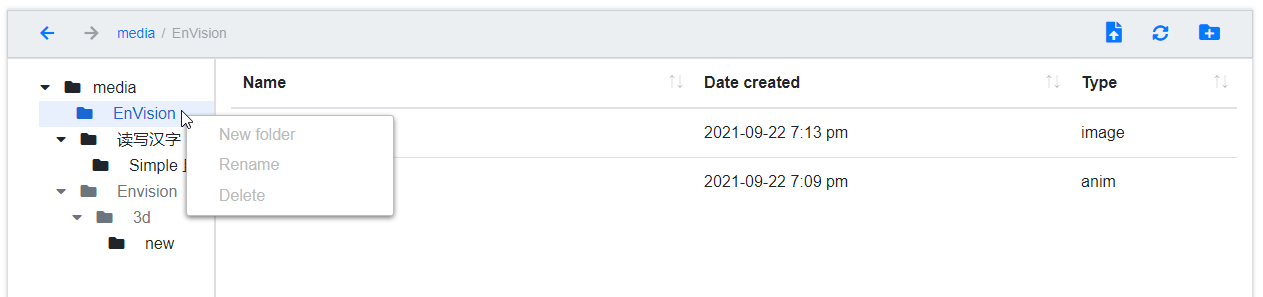
Slashes in a folder name are treated specially. A folder (or category) name such as Envision/3d/new will be parsed into a tree and displayed as shown below. The actual folder that is displayed is new (a leaf of the tree) which corresponds to the category Envision/3d/new. Since this leaf is the actual folder, the remaining folders Envision and 3d are non-existent and are thus grayed out. In order to make these into actual folders, you will have to create 2 more : EnVision and EnVision/3d. Folders may also be grayed out if you do not have proper permissions on them.
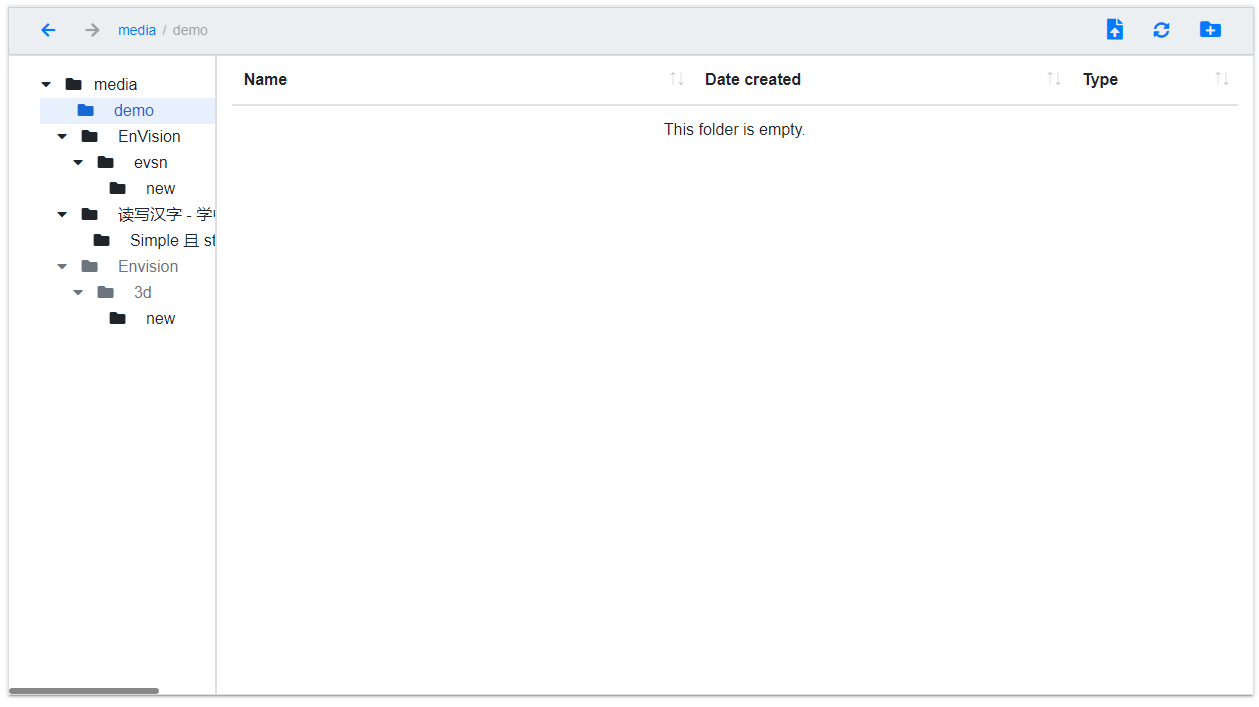
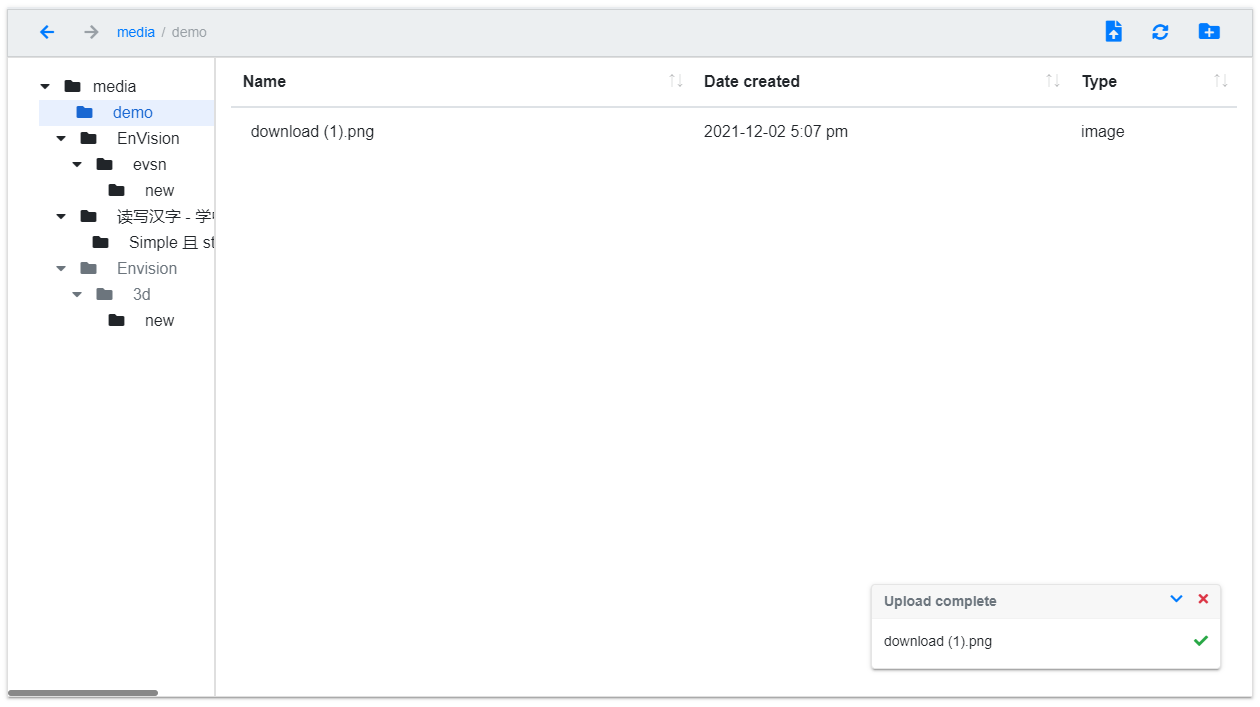
Click on the demo folder to navigate to it. It will be empty since we have not added any files yet. Click the Upload button and add a file. In the case of folders, the uploaded file will be linked to the currently clicked/highlighted folder, known as the current working folder. This new file will be given the permissions of the parent folder, that is the folder to which it was uploaded to.
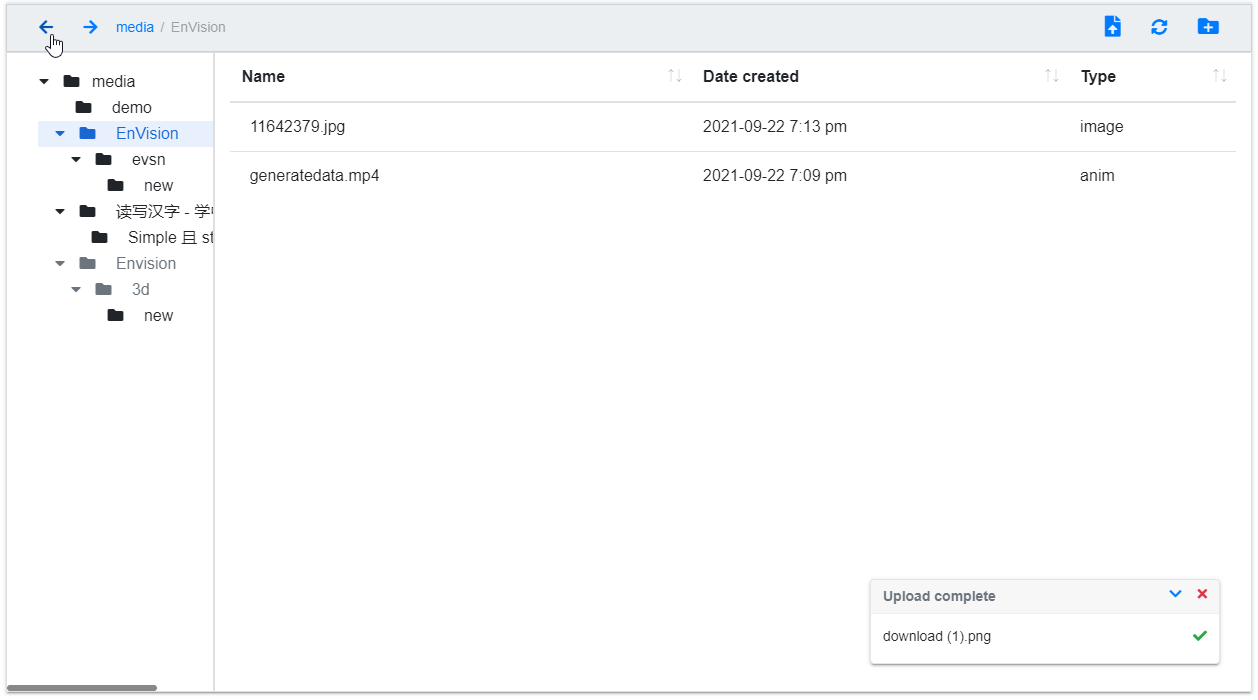
You may click on any folder to view its contents.
Just like any other file explorer, your history of navigation is tracked and saved. You may go back or forward in your history using the Forward and Back buttons.
To jump to a folder in the current path, click on the breadcrumb button.

Similar to files, folders also have their own context menu. Select a folder and right click on it.
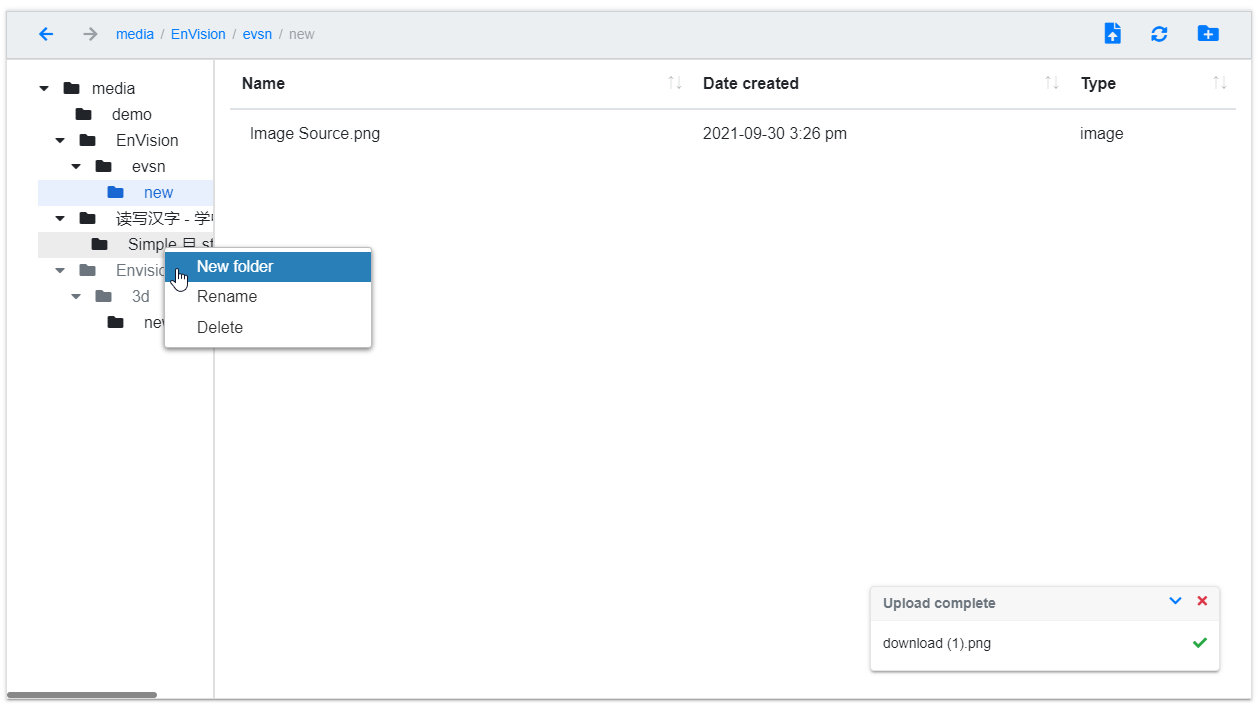
New folder is used to create a new child folder beneath the selected folder. Rename will bring up a dialog that will let you rename the folder. Delete deletes the selected folder as well as its children folders. A deleted folder's files are moved up to the root media folder and are not physically deleted.
Permissions:
Since folders are just Item Categories, all 4 types of permissions: own, view, change, delete, are all available for folders as well. These can be edited from the Manage Item Categories page that can be found under Query -> Manage item categories. Using these, you can simulate folder permissions. For example: if you want to give another user read permissions on folder demo, you would give view permissions to his group for the demo category. For write/upload and rename permissions, use the change permission. For delete permissions, use the delete permission. Own permissions can be used to give all 3 permissions at once.
One major difference between folders and item categories is that generally with categories, you can assign items to a category only if you have own permissions on the category, but in the context of the Media Browser alone, you can upload files to a folder (i.e. assign items to a category) if you have either change or own permissions on the folder. This is to simulate write permissions of a physical folder.
If you do not have certain permissions on a file or folder, the context menu option will be grayed out to prevent the operation.
Here's an example: Go to Query -> Manage item categories. Let's give view-only permissions to the group vis for the EnVision category.
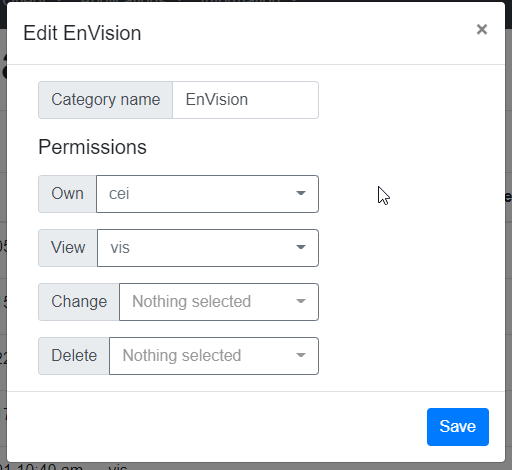
As a result, all permissions except read will be unavailable for both the EnVision folder as well as all files linked to that folder when logged in as the user.