How to add Ansys Dynamic Reporting Support to Your Existing Workflow#
Ansys Dynamic Reporting has been designed to collect and organize data coming from all possible sources. While Ansys Dynamic Reporting comes out of the box integrated with EnSight, it requires minimal effort to integrate it with any other software that you might be using in your workflow. It therefore becomes possible for the user to collect multiple information from different sources all related to a single project in a single database.
This section of the manual will show some example on how to do that. Feel free to extract these examples directly or modify them to adapt them to your workflow.
The Workflow#
Let's say that you are doing your analysis, and encounter some information you would like to store. It could be a file (for example, the file storing the parameters of your simulation, or a pdf file of a paper related to the analysis), a set of information (such as how many cores you are running your simulation on, on which machine, which solver version you used, ...), a set of results (a table of values), and so on. You would like not only to store this information, but to store it in an organized fashion and have it easily accessible, ready to be re-elaborated at a later time. Ansys Dynamic Reporting is exactly what you are looking for. All you need is to have Ansys Dynamic Reporting installed on your machine. We will now create a python scripts that will take the information (file / set of information / table of values) and push them into Ansys Dynamic Reporting.
Setting Up the Script#
Create a file for your script - for example, workflow.py The first operation in your script will be to call the libraries needed to use the Ansys Dynamic Reporting API. This is done via the following lines:
from ansys.dynamicreporting.core.utils import report_remote_server, report_objects
import requests
Connecting to the ADR Nexus server#
Now we are ready to connect to the ADR Nexus server. In this example, we suppose that there already is an ADR Nexus server that is up and running on your local machine - we will call it http://localhost:8000, a server running locally on port 8000.
serverobj = report_remote_server.Server("http://localhost:8000", "nexus", "cei")
try:
   serverobj.validate()
except:
   print("Can't connect to the server")
   exit()
The first line will connect to the ADR Nexus server (username = nexus,
password = cei). The try/except verifies that the connection was
successful. On success, serverobj.validate() will return the version of
the ADR Nexus instance.
The Ansys Dynamic Reporting Session#
The next step is to get a Ansys Dynamic Reporting session. If you want to create a new session with every run of your script, you just need to change any attributes you want on the default session. For example, to create a new session with every run with the session name 'Cube Analysis', the code would be:
session = serverobj.get_default_session()
session.application = 'Cube Analysis'
If, on the other hand, you want to add the information to an existing Ansys Dynamic Reporting session, then you will need to get the session guid (identification string), and assign it to the session you are working on in this script. The following code will query the database, looking for an existing session with the name 'Cube Analysis'. If it finds one, it will set the guid and application name of the default session to the existing session and all data pushed to that session will be assigned to the existing session. Otherwise, the code will create a new session with the desired application name. The corresponding lines are:
session = serverobj.get_default_session()
items = serverobj.get_objects(objtype=report_objects.SessionREST, query='A|s_app|eq|Cube Analysis')
if len(items) > 0:
   session.guid = items[0].guid
   session.application = items[0].application
else:
   session.application = 'Cube Analysis'
Pushing Data Into the Database#
We will now see a few examples on how to push data into the database. Note how none of these data is related to EnSight. The source of the data is irrelevant from Ansys Dynamic Reporting' point of view.
Pushing a File#
We will start by pushing an entire file to the database. Let's say you have a file called input.param in the directory C:\my_analysis that is the file with the input parameters for the simulation. You might want to store it together with the results of the simulation and its analysis for future reference.
To push the file into the Ansys Dynamic Reporting session, you will simply use the following commands:
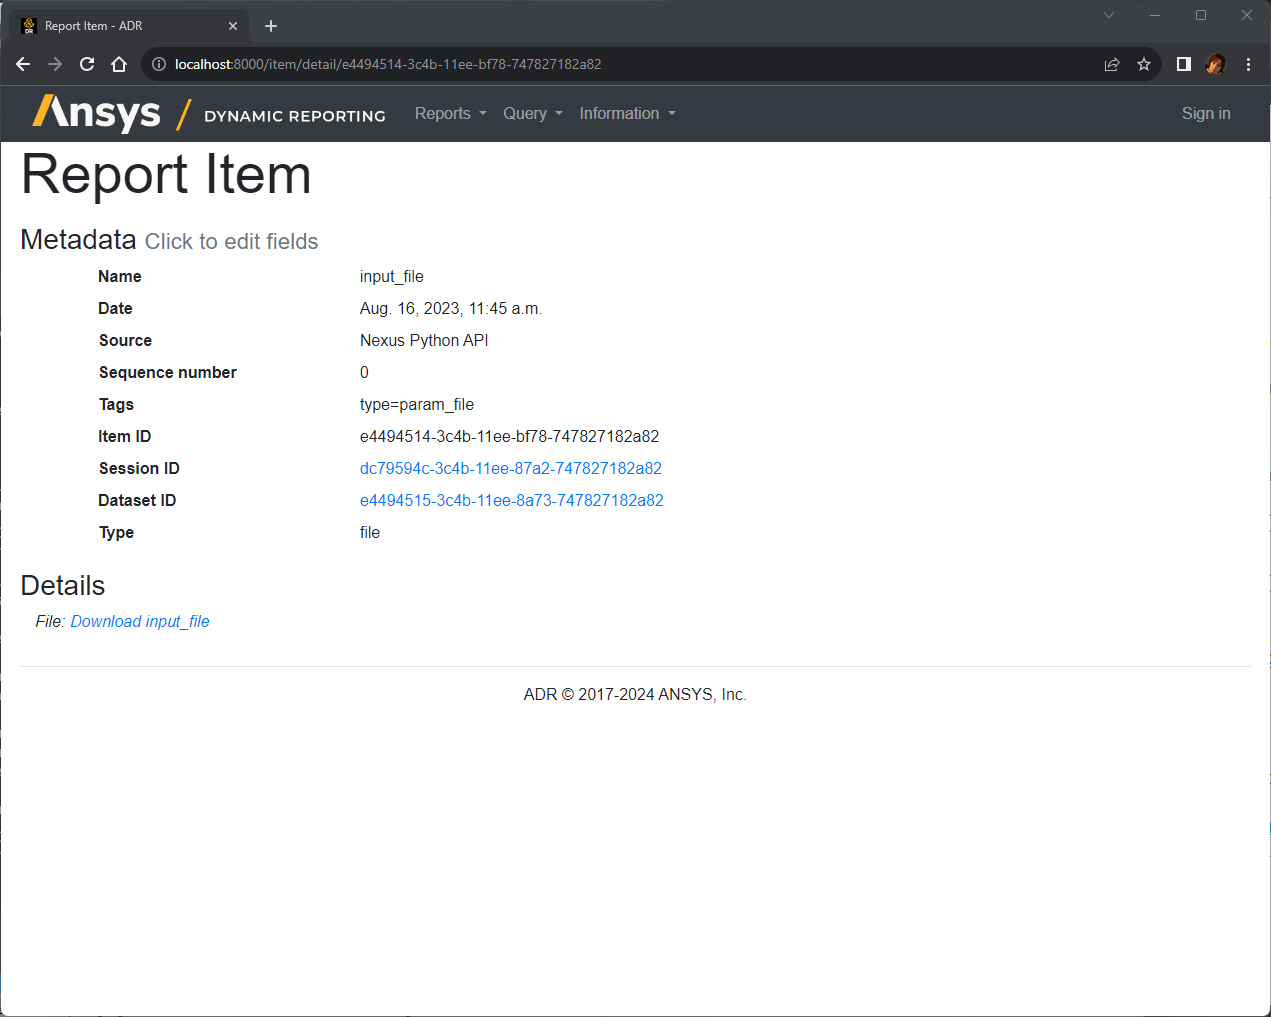
item = serverobj.create_item(name="input_file")
item.set_payload_file("C:/my_analysis/input.param")
item.add_tag("type", "param_file")
error = serverobj.put_objects(item)
Note that the path used includes the escape character '\'. The 'r' prefix disables escape character processing for that string. In this case, the tag associated with the object will simply be type=param_file. You can add any additional tags with more calls to add_tag().
You might wonder how a file item will appear in the ADR Nexus server web interface. We have seen in the Getting Started Manual that image items appear as images, table items appear as tables or as plots that you can interact with, and so on. For a file item, the ADR Nexus server web interface will simply show a link with the file name. If you click on it, the file will be downloaded.
Pushing a 'Set' of Information#
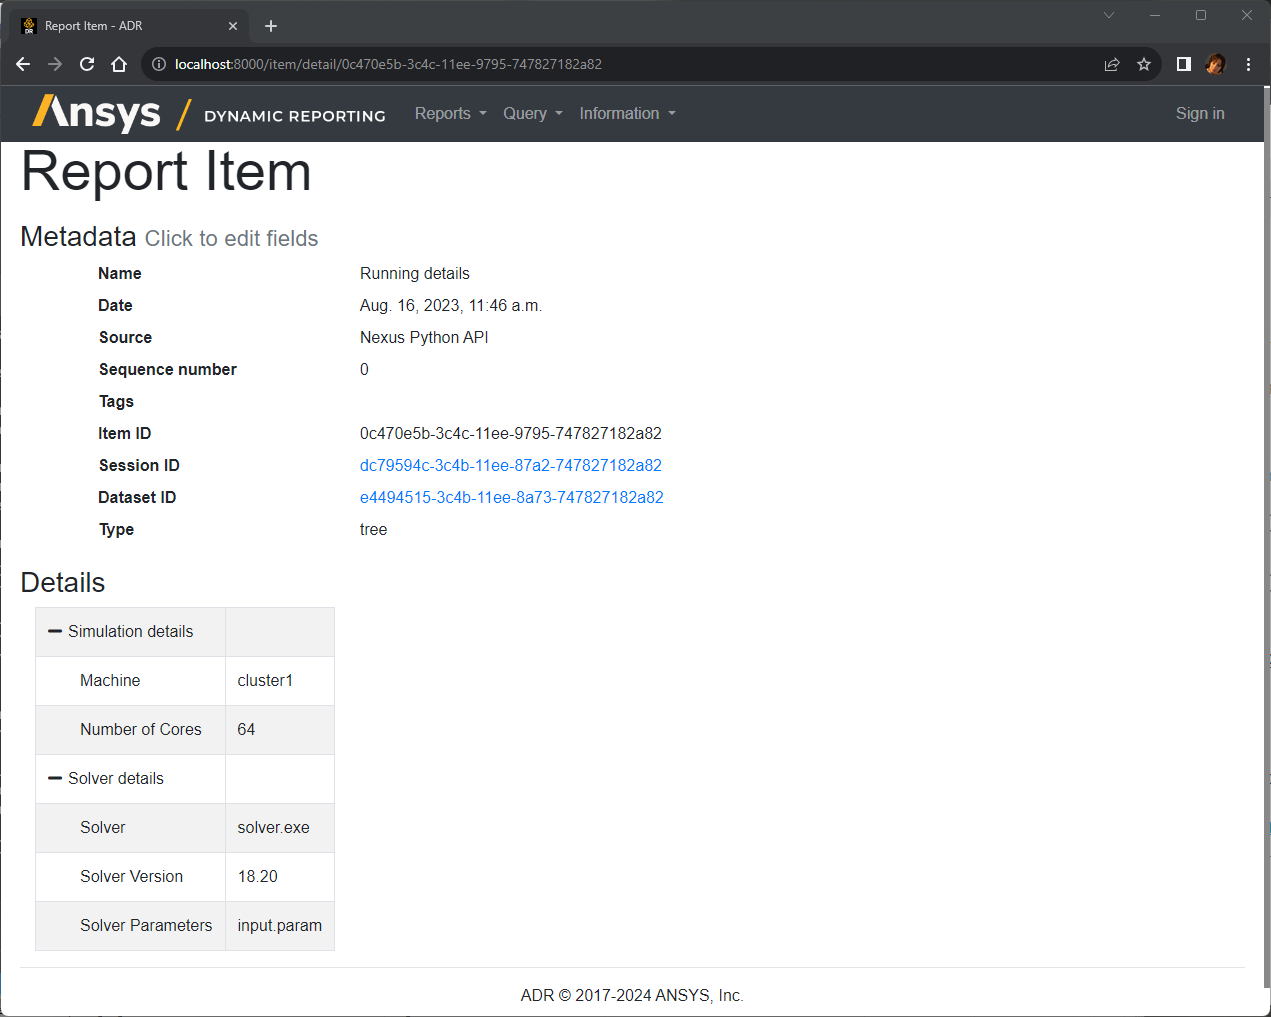
Let's suppose that now you want to store some details about how the simulation was run. For example, you want to record the version of the solver, which machine you ran it on, on how many cores. Then, you can create a tree item that contains this information, and store it into Ansys Dynamic Reporting.
solv_info = list()
solv_info.append(dict(key='solv', name='Solver', value='solver.exe'))
solv_info.append(dict(key='version', name='Solver Version', value=18.2))
solv_info.append(dict(key='parameters', name='Solver Parameters', value='input.param'))

leaves = list()
leaves.append( dict(key='hostname', name='Machine', value='cluster1'))
leaves.append( dict(key='n_cores', name='Number of Cores', value=64))
tree= list()
tree.append( dict(key='root_sim', name='Simulation details', value=None, children=leaves, state="expanded") )
tree.append( dict(key='root_solv', name='Solver details', value=None, children=solv_info, state="expanded") )
item = serverobj.create_item(name="Running details")
item.set_payload_tree(tree)
error = serverobj.put_objects([item])
This tree is divided into two major sections: one for the information on the solver, and the other for the information on the simulation run. If you access this tree item via the Ansys Dynamic Reporting web interface, this is how it will appear:
Pushing a Table#
Let's suppose that you have also other data, in form of a set of data points, that you want to record. For example, you might have the value of a variable at multiple probe points at multiple timesteps. You can store this as a table in Ansys Dynamic Reporting, where each row is a single probe point, and each column is a timestep.
Let's say, for example, that the python script has access to query0, a python list that contains the values of the variable for the probe 0, and query1, a python list that contains the values of the variable at probe 1. Now you can push this information in Ansys Dynamic Reporting with the following lines:
import numpy

item = serverobj.create_item(name="My Values")
query_data = numpy.zeros((2,5), numpy.double)
query_data[0] = query0
query_data[1] = query1
d = dict(array=query_data, rowlbls=["Probe 1", "Probe 2"],
         collbls=["Time 0.0", "Time 1.0", "Time 2.0", "Time 3.0", "Time 4.0"],
         title = "Temperature at Probes")
item.set_payload_table(d)
item.set_tags("var=tempearture query=2")
error = serverobj.put_objects([item])
The data will be stored as a table. You will have the ability to visualize the data as table, or as a plot, with each query being a separate plot line.
Running the Script#
Finally the script to push all your information is ready. To run it, you will need to use the python executable that is contained in Ansys Dynamic Reporting - indeed, this executable contains the Ansys Dynamic Reporting libraries that are needed for these commands. All you need to do is open a command prompt / shell, cd into the directory where you have the script, and run:
cpython workflow.py