User Interface#
This can be used by both the user as well as admins.
Users have the ability to add/edit/delete categories through this interface.
Users can also use the GUI to assign/remove per-category permissions to/from user groups.
While uploading an item, it is possible to assign a category to the item.
Users also have the option to bulk-assign/remove categories to/from multiple items at once.
Each item on its detail page also allows editing of its categories.
Managing item categories#
The interfaces described here can be used to create/delete/edit item-categories and also modify permissions on them.
Once you've logged-in, go to Query -> Manage item categories.
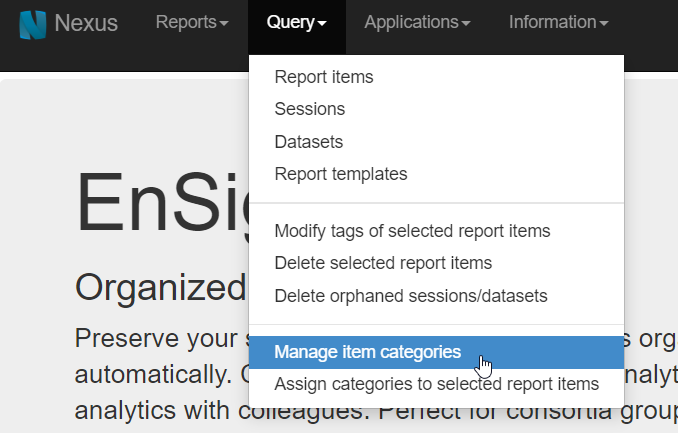
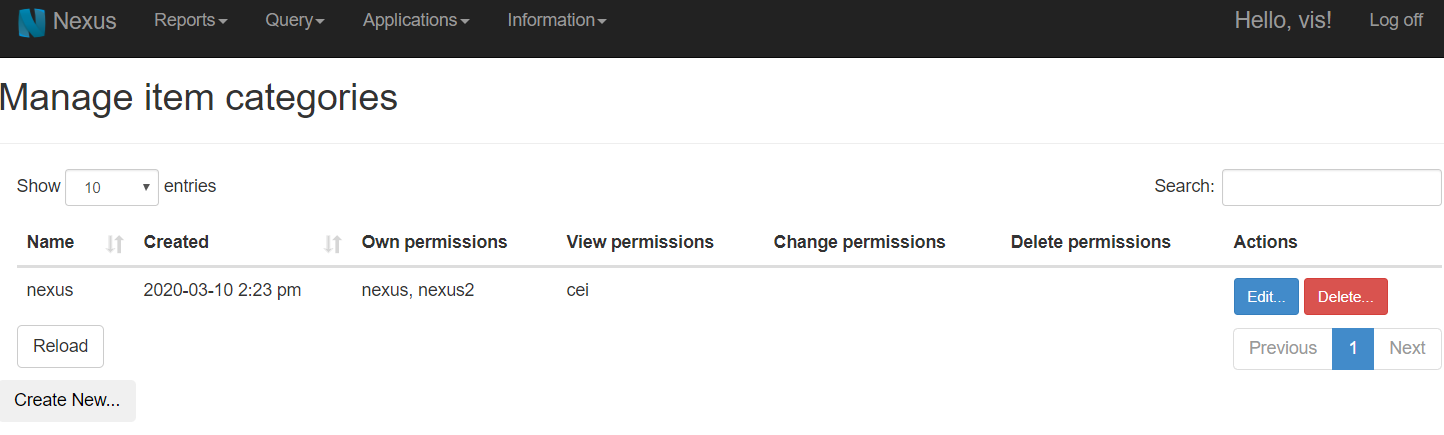
You will then see the 'Manage item categories' page where you can create/delete/edit item-categories and also modify permissions on them. Note that you will only see item categories that you have 'own' permissions on, through the groups you belong to. The only exception to this is the superuser who has unrestricted access.
Note
Note that you need the global permission 'Can add item category' to create an item category and for the Create New... button to show up. The only exception to this is the superuser who has unrestricted access.
Click on the 'Create New' button to create a new item category. You should then see a modal dialog where you can add a name and then set permissions on the category.
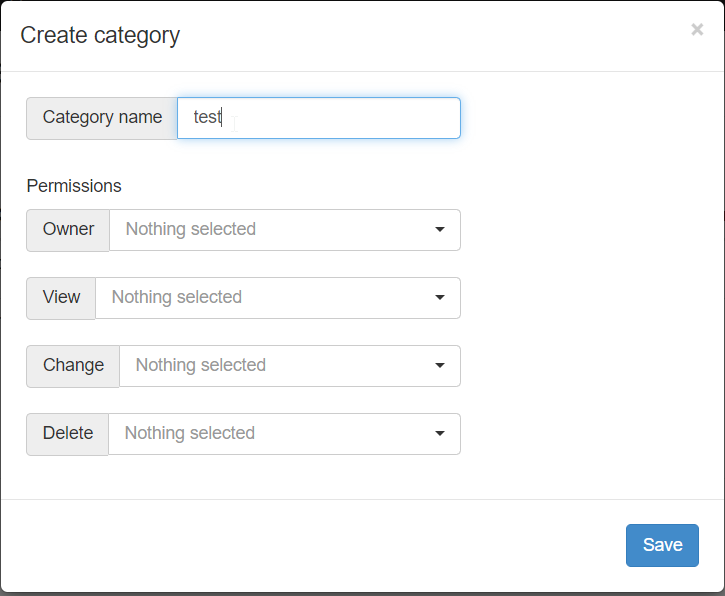
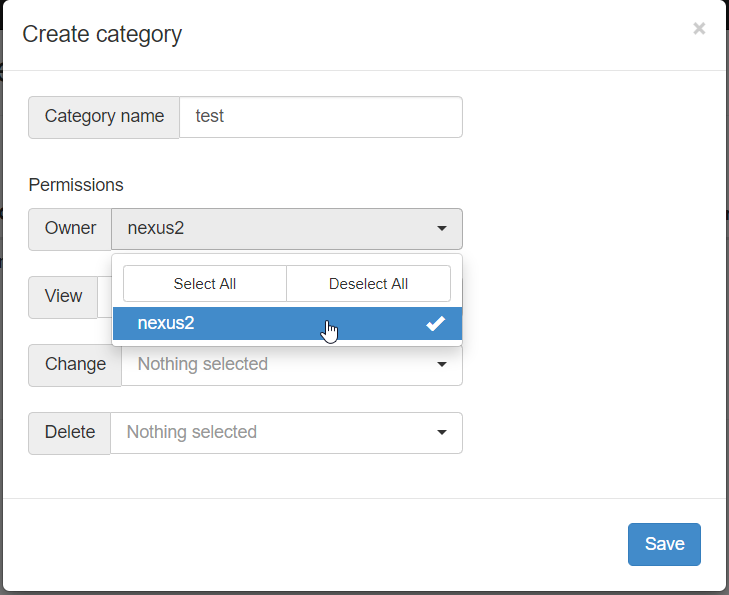
Each drop-down will contain a list of groups. Note that you will only see groups you belong to, unless you're the superuser.
Note
Note that you must select at least one owner group, otherwise you will lose access to the category since you're not the owner anymore (unless you're the superuser).
Once you're done, click Save and you should see your item category list updated immediately.

Similarly, you can click the Edit button to edit it later, and a similar dialog will show up. Note that, in this case, under the permissions section, in addition to groups you belong to, you should also see other groups that have permissions on that category. You will not be able to perform changes on these groups, since you don't belong to them. They are for viewing only.
You may also delete any category by clicking the Delete button, confirm deletion and the category list will be updated.
Bulk-assigning/removing categories to/from items#
This interface can be used to assign/remove categories to/from multiple items at once.
From the navigation bar, select Query -> Assign categories to selected report items.
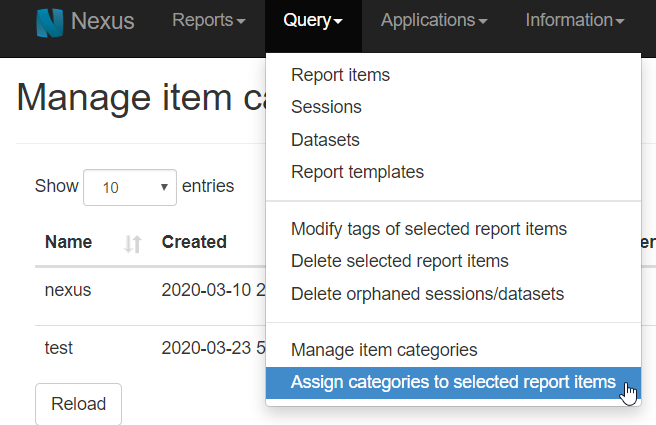
Image#
Set the query for appropriate list of items you want to change.
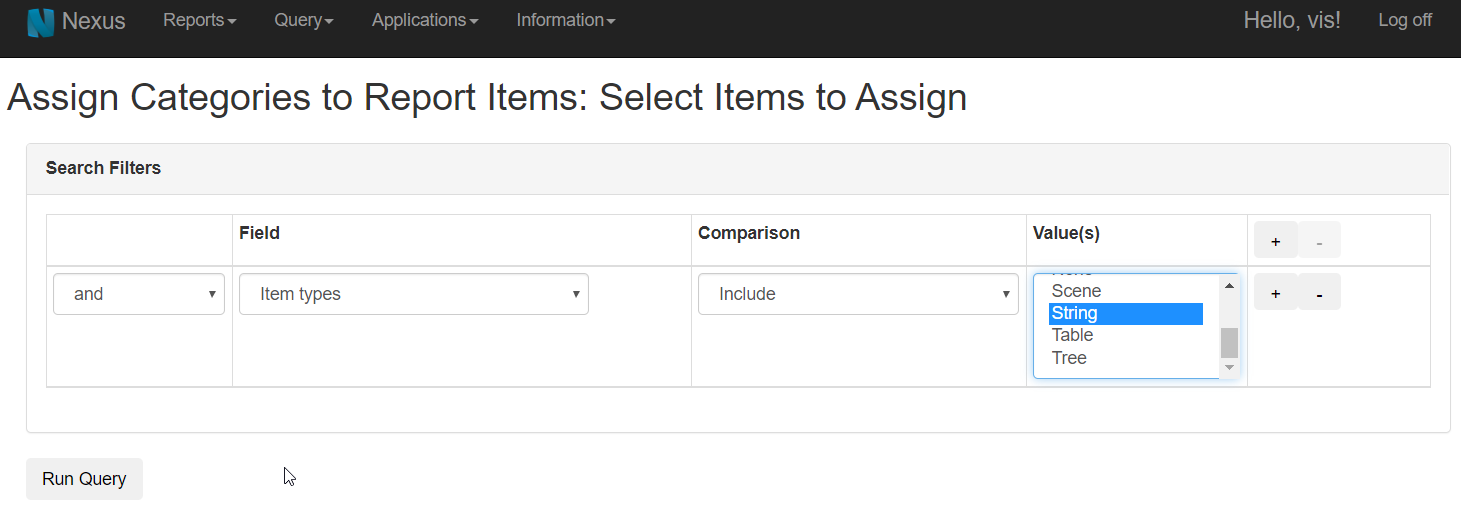
Image#
When you hit 'Run Query', you will then see the results of your search.
Image#
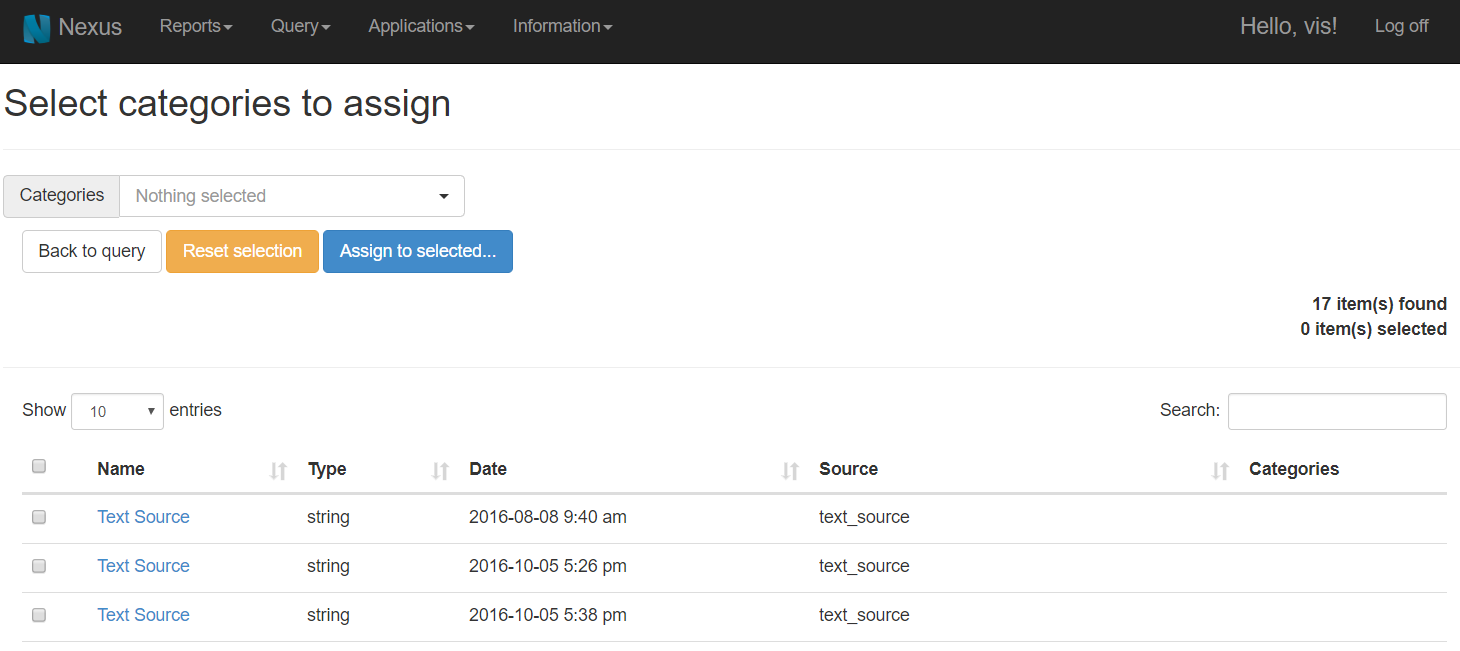
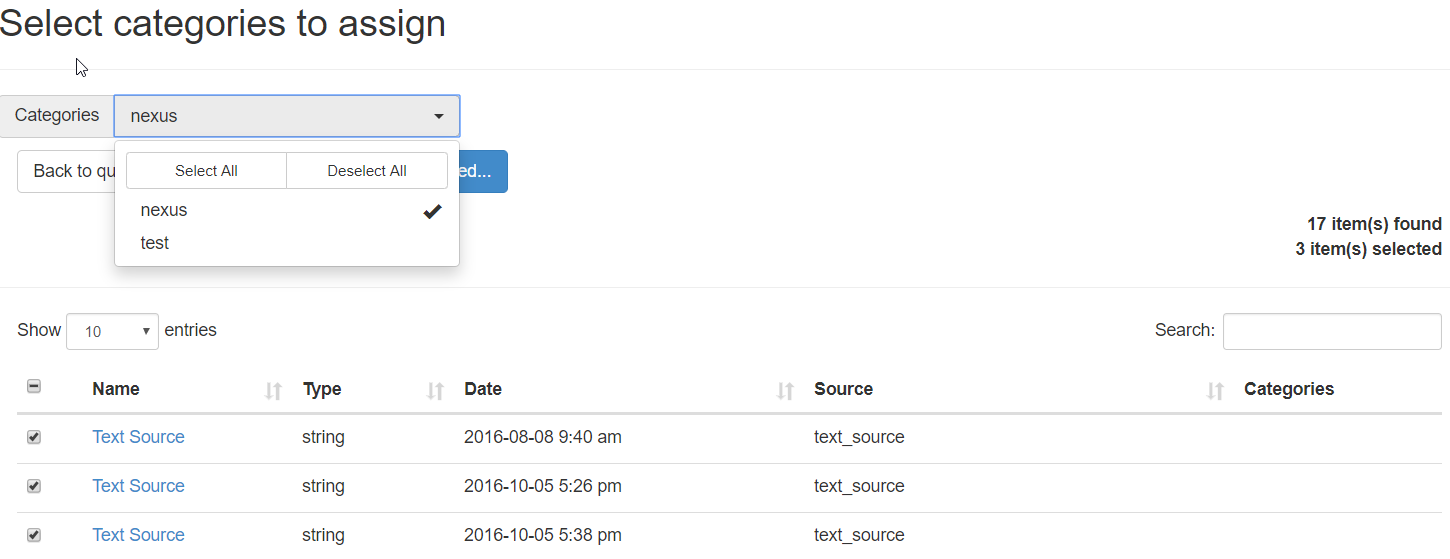
You will see a drop-down list when you click on Categories. Select as many as you want. Select the items you want to assign the selected categories to.
Image#
Note that you will only see categories you own, i.e those categories that any of your groups have 'own' permissions on. The only exception to this is the superuser who has unrestricted access.
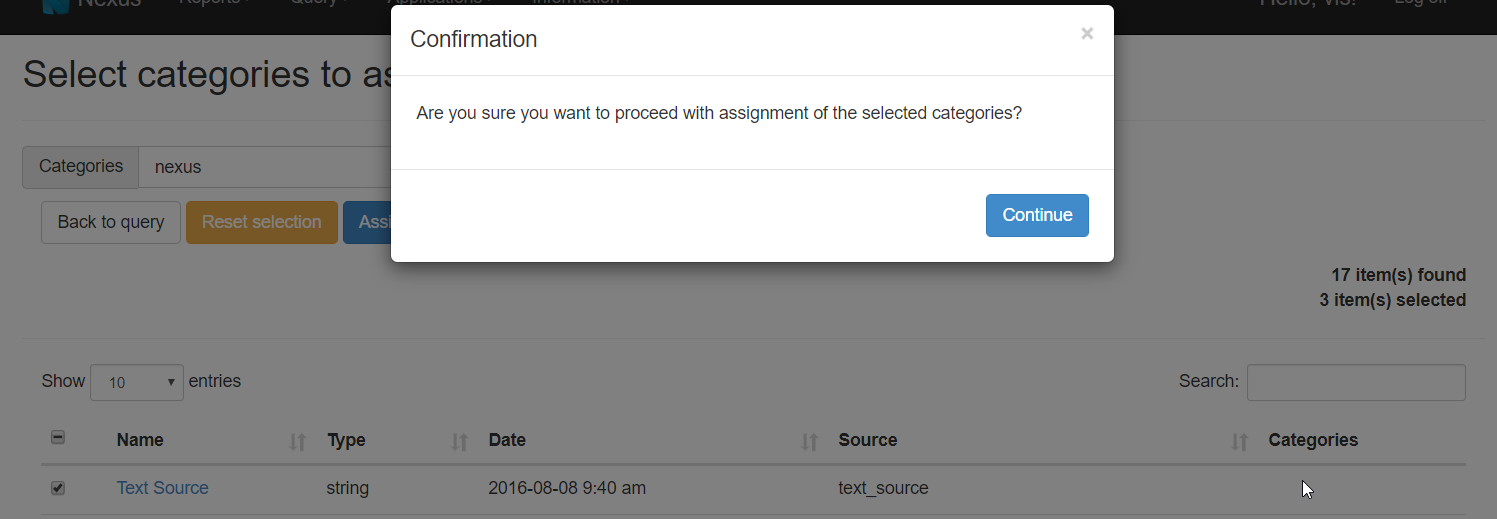
Then click 'Assign to selected...' and then 'Continue'.
Image#
You will then see the Categories column update, as a result, showing the categories you chose.

Image#
Now let us remove the assigned category from one of the item. Hit 'Reset Selection' to start fresh. This should reset the previous selection.
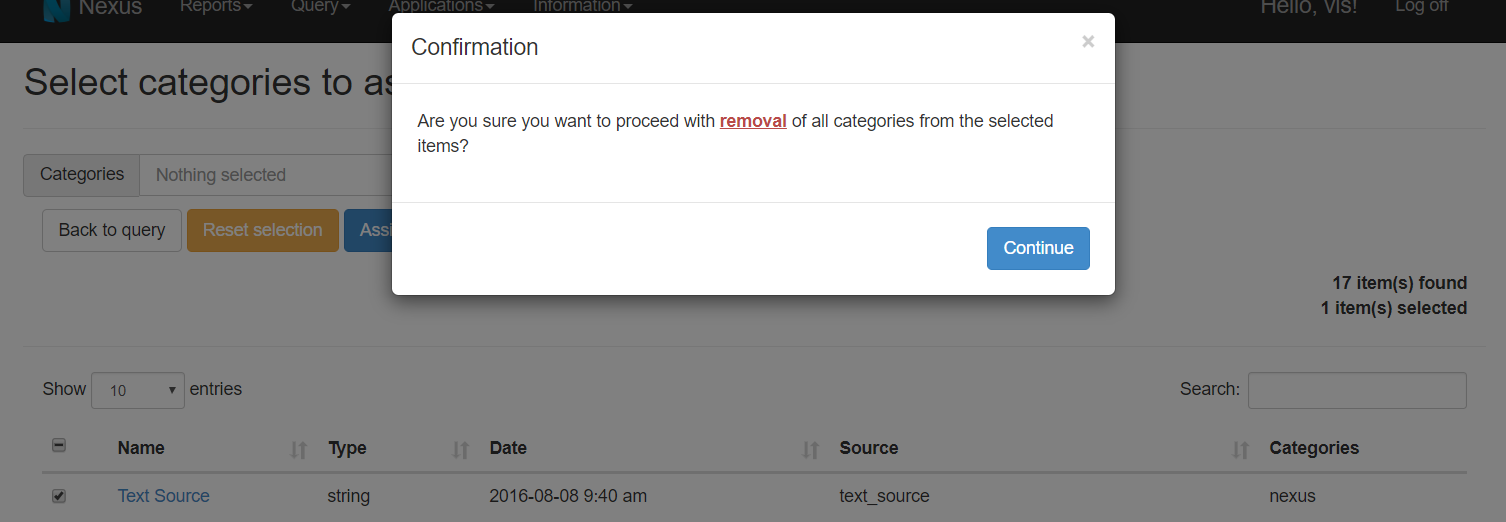
Click the 'Categories' drop-down. But this time, remove the selection by clicking 'Deselect All'.
Now, your category selection is an empty set. Lets remove the category from the first item by assigning this empty set to the item's category set. Assigning an empty set of categories will effectively remove all categories the item(s) were previously assigned.
Image#
Read the prompt, click Continue. The item list will be subsequently updated.
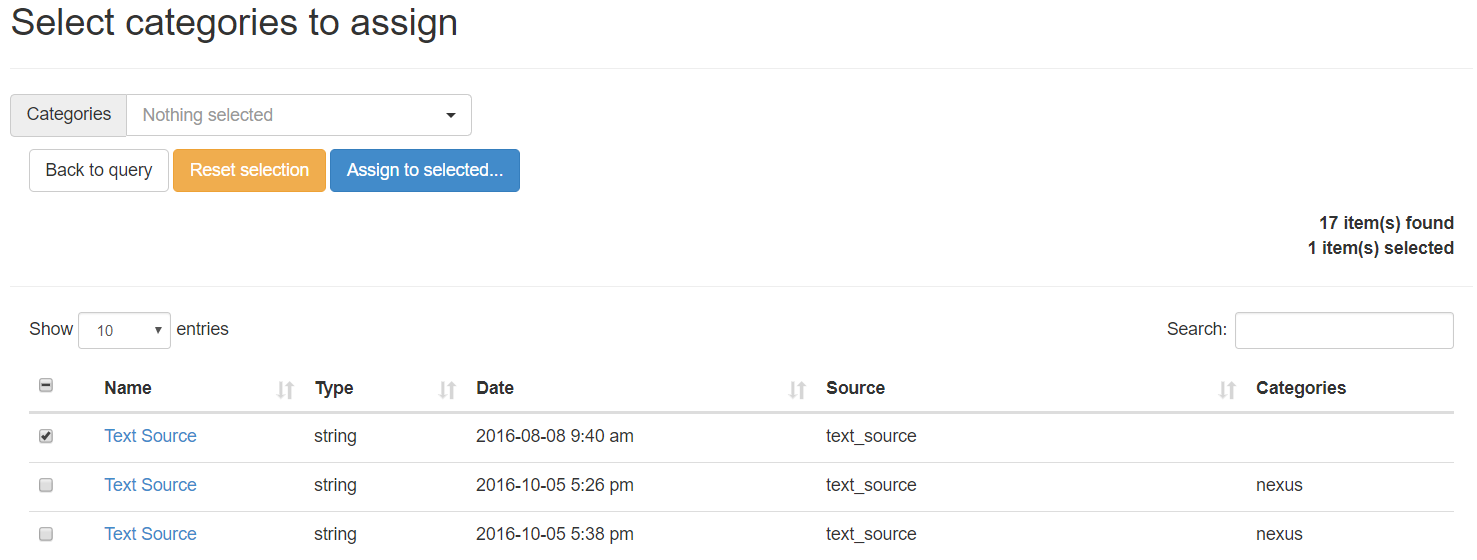
Image#
Assigning categories during upload#
The item upload page in the Nexus web GUI now allows setting categories as well during upload.
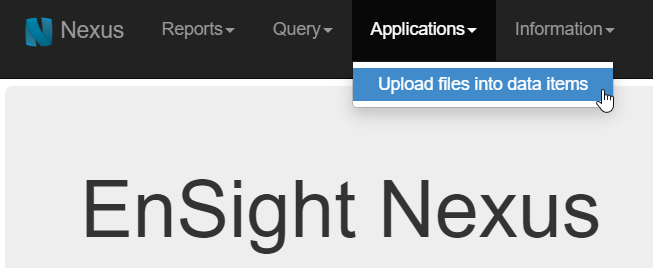
From the navigation bar, select Applications -> Upload files into data items.
Image#
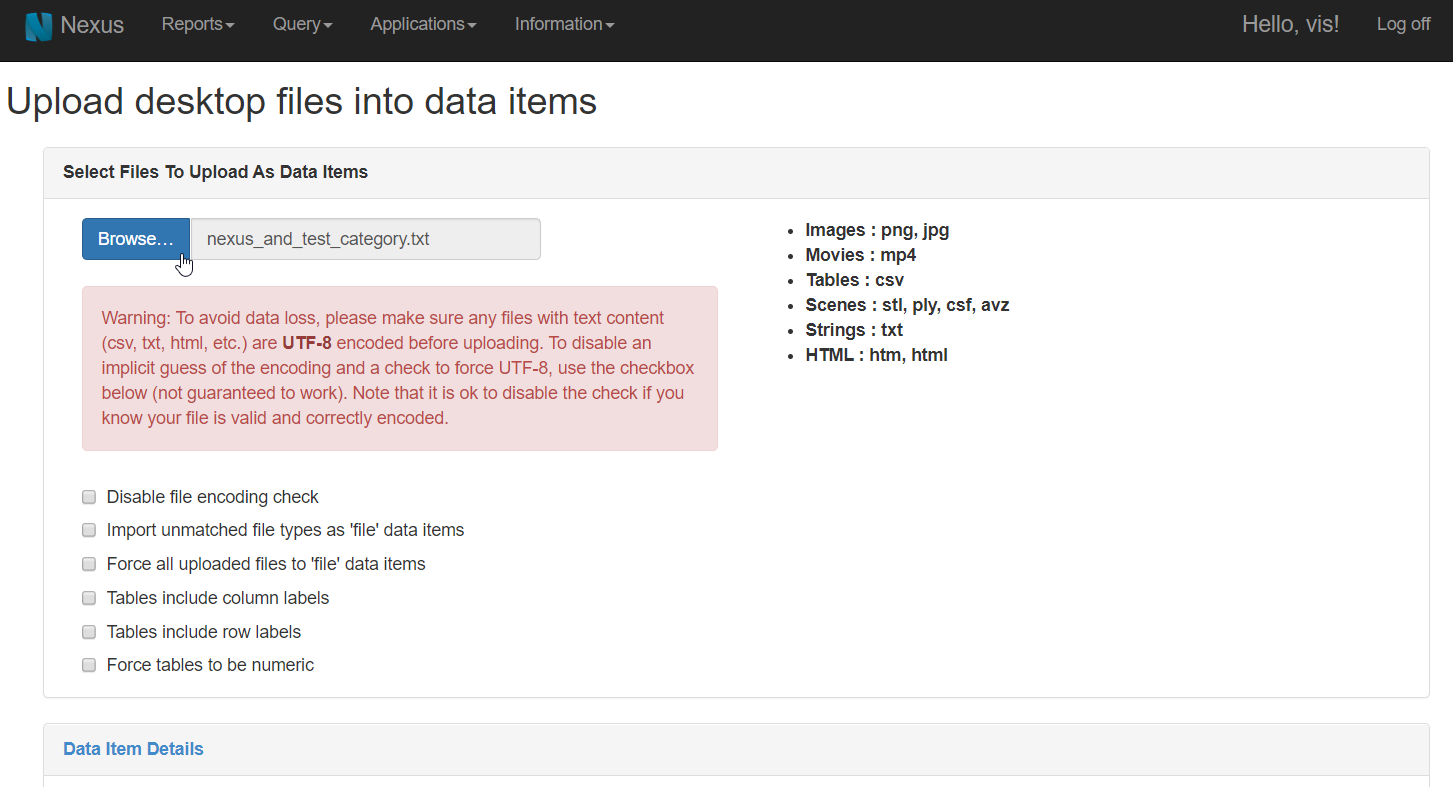
You will see the item upload page. Click Browse and choose something to upload. Supported file formats are displayed on the right.
Image#
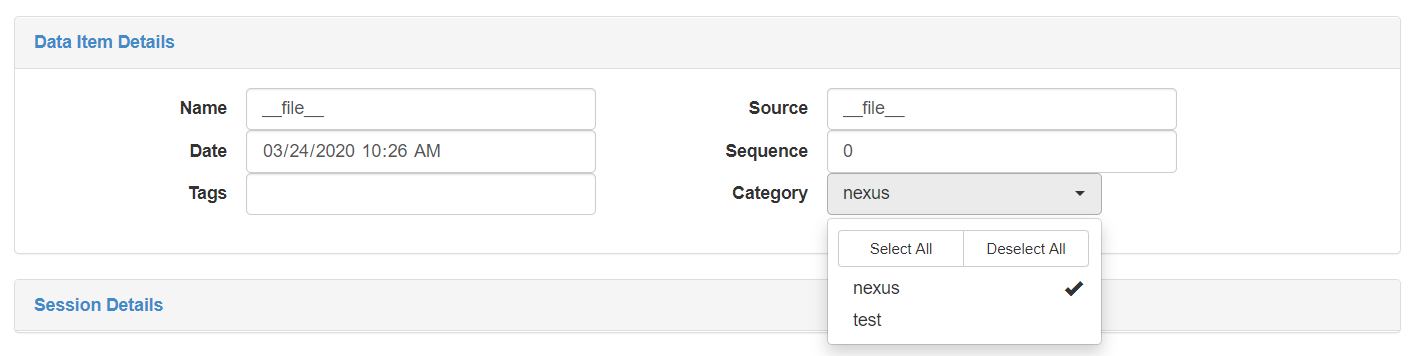
Under 'Data Item Details', you will see a drop-down with a list of categories. Note that in this list, similar to other category lists you have seen, you will only see categories you own, i.e those categories that any of your groups have 'own' permissions on. The only exception to this is the superuser who has unrestricted access.
Image#
Now choose categories as you wish, and then click the Upload button. You will see a notification if the upload was successful.

Image#
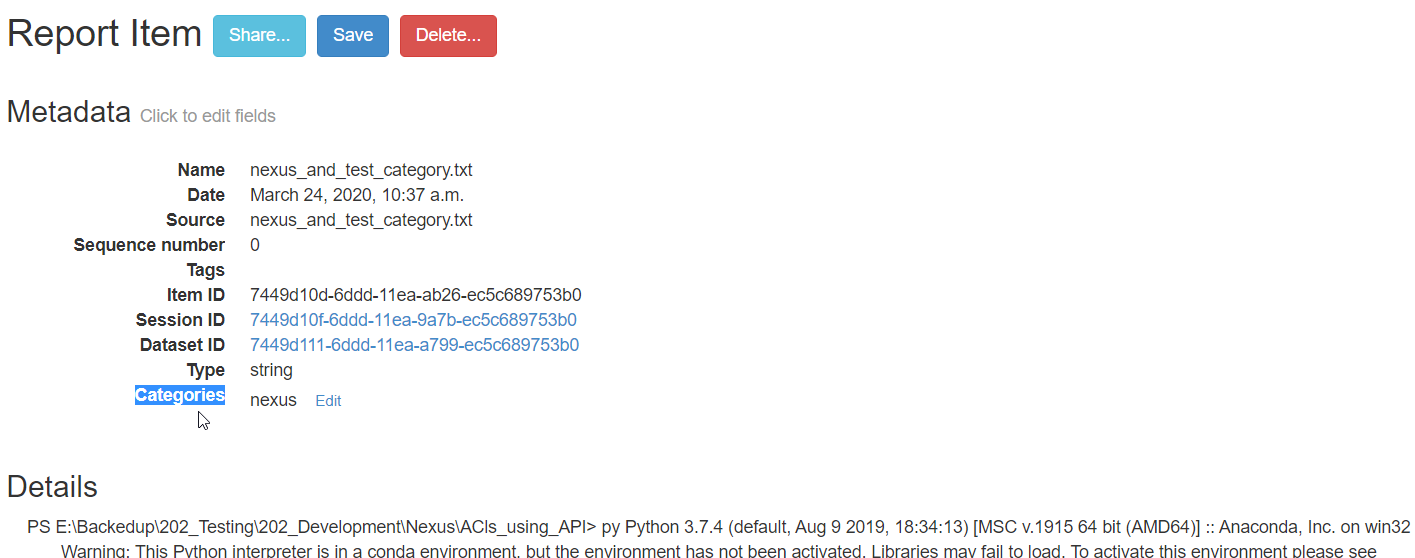
Clicking on the filename in the notification will direct you to the uploaded item's detail page. Here, you can see the categories we set during upload show up as an attribute of the item.
Image#
You can also edit categories after uploading. We will explore this in the next tutorial.
Editing categories through the item detail page#
The item detail page shows metadata that includes attributes of an item and also its contents, all in one page. In addition, the detail page also lets you edit and save, delete or share an item.
Edit/Delete operations are self-explanatory so we will only see an overview of them in this tutorial.
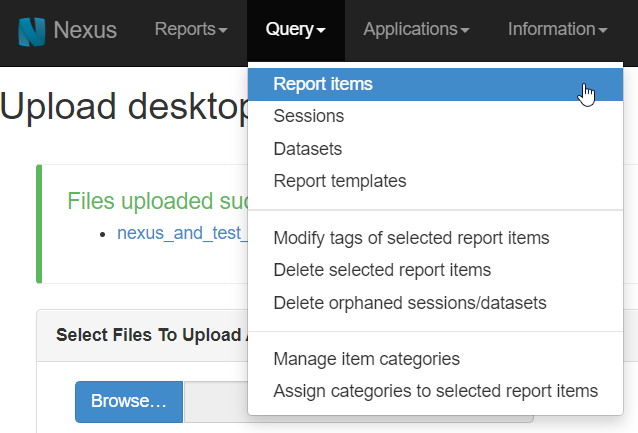
There are multiple ways to get to this page:
Query -> Report items
Query -> Modify tags of selected report items
Query -> Delete selected report items
Query -> Assign categories to selected report items
Image#
After you click on an option, run a search and then click on any item's name in the returned list.

Image#
Another way of getting to the detail page is by clicking on the filename in the notification that you may see after you upload an item, like we saw in the previous tutorial.

Image#
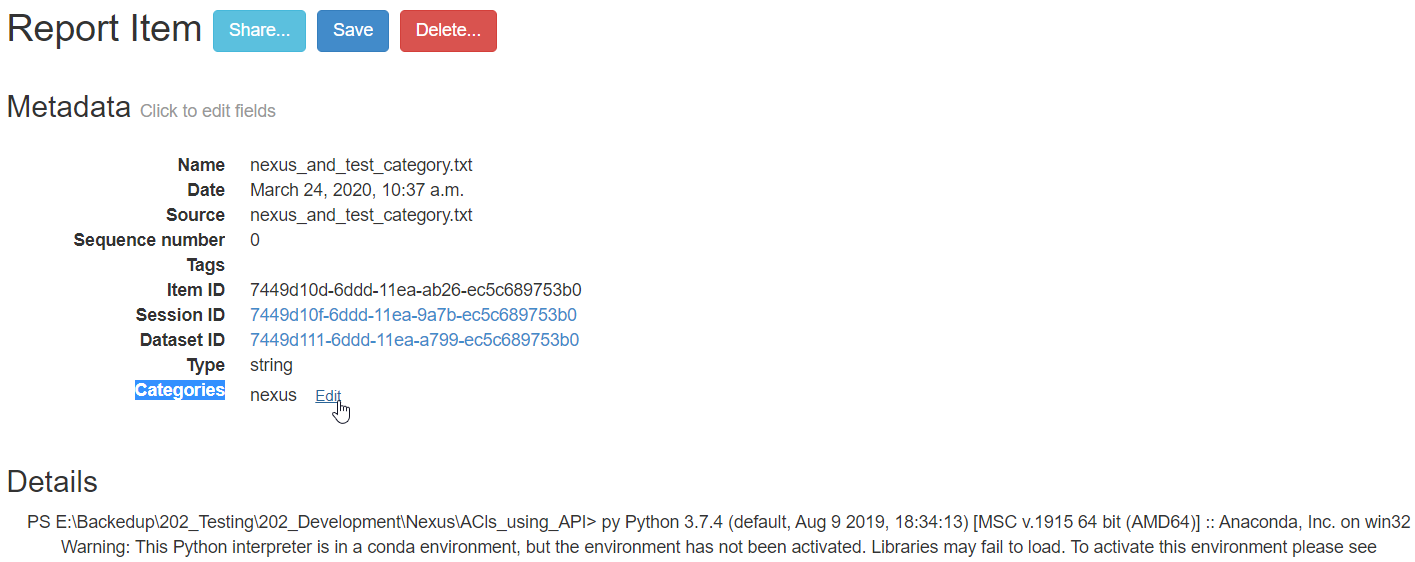
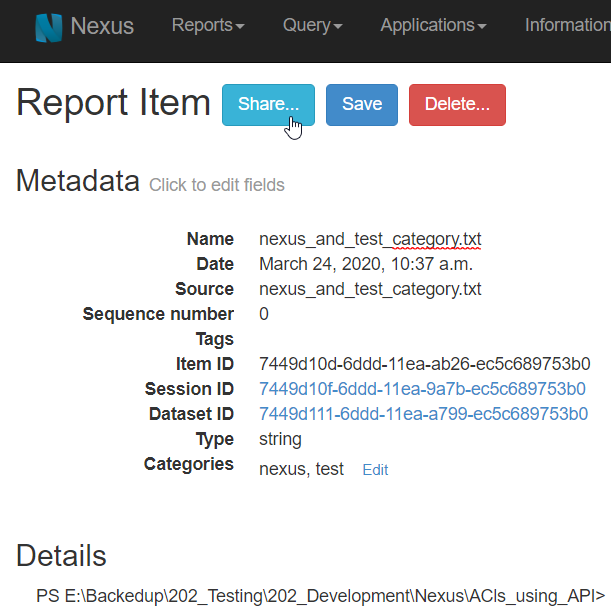
Once you are in the item detail page, you will see a list of metadata and then the item's actual content that was saved during the upload. Included in this metadata is the set of categories that have been assigned to an item. We will see how to change these, should you have to.
Image#
Only some fields are clickable and editable. You may click on any attribute's value, for example, Name, edit it and then click Save.
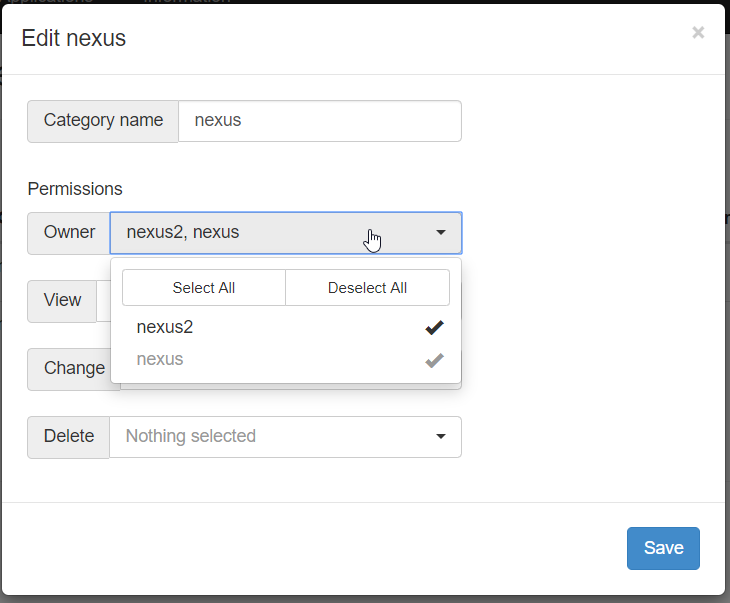
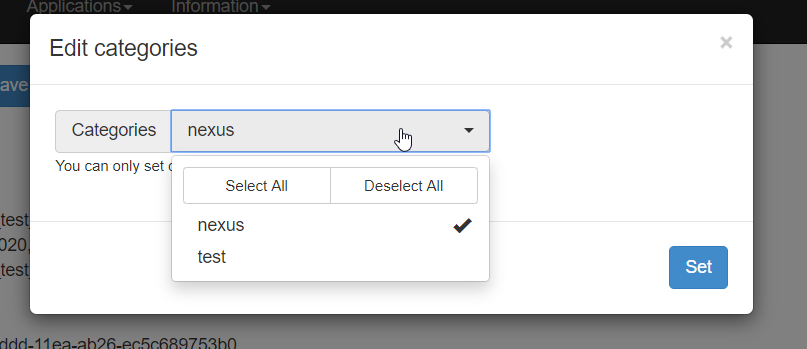
Our goal in this tutorial is to see how to edit categories. As shown in the screenshot above, click Edit next to the Categories attribute. This will open up a modal dialog, which will display a list of categories.
Note that in this list, similar to other category lists you have seen, you will only see categories you own, i.e those categories that any of your groups have 'own' permissions on. The only exception to this is the superuser who has unrestricted access.
Image#
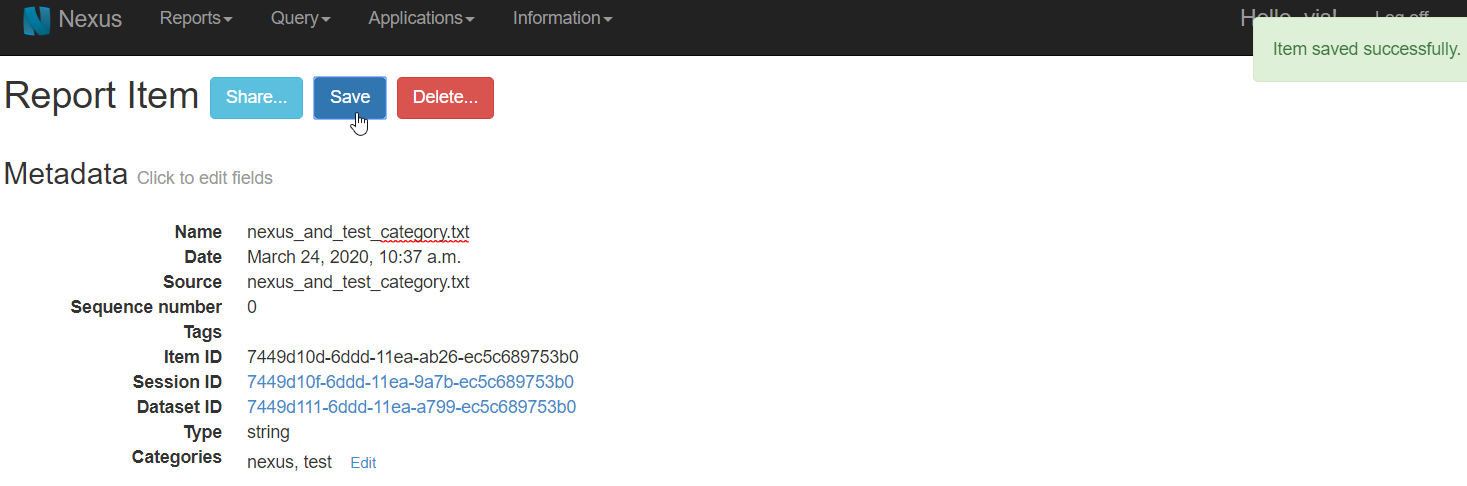
Once you've selected the categories, click Set. Note that this won't actually save the item and only temporarily changes the category set. To save it, you have to click the Save button at the top. You will see a notification describing the result of this operation.
Image#
Sharing an item from the item detail page#
The item detail page, in addition to displaying item data, also lets you edit and save, delete or share an item.
You may want to look at the previous tutorial to see how to get to the detail page of an item.
Item Sharing:
Item sharing is a feature that is a part of the ACLs infrastructure.
It lets you share an item to another person who may not have access to that item.
The shared item is only temporarily accessible through the shared URL, for a period of one week.
The shared URL only provides temporary viewing permissions, nothing else. This means any viewing permission checks as a part of the ACLs infrastructure are skipped if a shared URL is used, until the URL expires.
Any logged-in user with the URL can view the item.
You may need this option to share an item with a colleague temporarily without the need for permanently changing any permissions on the item or its category.
2020 R2 is an initial release of this feature and it will be made more configurable in future.
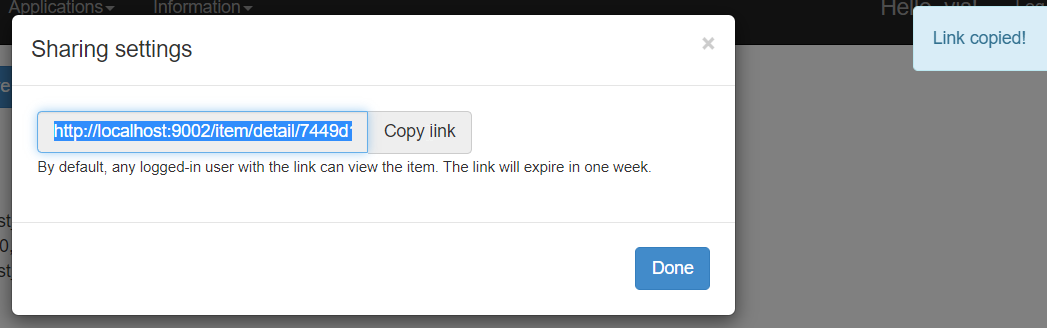
From the item detail page of any item, click the Share... button.
Image#
You will see a modal dialog that contains the URL to be shared. Clicking on Copy Link will copy the URL to the clipboard. You will see a notification.
Image#
You may then share the URL with any person to whom you'd like to temporarily grant view access. Any logged-in user with the link can view the contents. The link will expire in one week. After that, you will have to go to the item detail page and click Share... again to get a newly generated URL.