Remote Session Configuration#
Configuring a remote session relies a great deal on the resources and requirements of a specific site. Ansys Dynamic Reporting provides some core functionality that simplifies the delivery of VNC-based rendering solutions to end-users. These features include:
An integrated VNC client run in a web-browser. This allows for a true zero-footprint install solution that only relies on Ansys Dynamic Reporting and VNC server technologies installed on the remote systems.
Resource tracking and simple configuration. All users of the remote sessions allocate the sessions using web pages generated by the Nexus server. As such Nexus can track session allocations and exert control over the remote rendering resources via a common database.
Proxy authentication and authorization. The remote session system exploits the authentication and authorization system in the Nexus server.
WebSocket interface for data tunneling. The system implements a websocket-based transport system that utilizes existing socket system used by the NGINX instance. It also supports SSL for encrypted connections.
Note
All of the files used in examples here can be found in the Ansys Dynamic Reporting distribution as:
v242/CEI/nexus242/django/utils/remote/config
To enable embedded remote sessions, the "Enable external session" option must be enabled. There are two types of remote sessions.
Built-in local EnSight and EnVision sessions. These are associated with file data item filename extensions. For example an uploaded .evsn file will automatically be associated with EnVision. These sessions will run on the same system as the nexus server and require no specialized configuration.
Externally specified configurations. These are specified in the file 'external_services.json' file that is placed in the database directory (the same directory as the view_report.nexdb) file.
Configuration ('external_services.json') File#
The first step in the configuration is to consider what types of remote rendering solutions one wants to provide access to.
In this example, we will focus on providing access to a software
rendering vncserver-based configuration. Included in the distribution is
a simple example that leverages a "start/stop" script running on remote
nodes. That example uses an instance of the x11vnc application to
provide VNC access to a hardware accelerated X11 server (see the scripts
start_x11_server.sh, stop_x11_server.sh,
x11vnc_desktop_session.py for an example of how this type of
configuration can be realized).
The Nexus remote rendering system utilizes a configuration file in JSON format. The file describes a Python dictionary that contains descriptions of all of the available session types. An example might be:
{
   "Local Software Session": {"script": "desktop_session.py", "count": 2,
      "options": {"sizes": ["12080x1024", "1600x1200"], "display_base": 100}},
   "Cluster Node Session": {"script": "x11vnc_desktop_session.py", "count": 1,
      "options": {"sizes": ["1600x1200"], "group": "ClusterRendering", "host": "n8"}}
}
This configuration file defines a single Python dictionary with multiple keys (e.g. "Local Software Session"). Each key is the name of a type of session. The value of each session key is a Python dictionary. There are three required keys in each session dictionary. These include:
script: the name of a Python script file responsible for creating an object that can start and stop a session.
count: the maximum number of simultaneous instances of this session type
options: a dictionary of optional data items that can be used by Nexus to customize the web interface and any additional data items that can be used by the session instance
Each type of session must provide the name of a Python "script" file.
This file must create an instance of a Python object (a subclass of
RemoteServiceScript) that is responsible for starting and ending a
session. There can be multiple instances of each session type active at
the same time. This is limited with the "count" key which specifies the
maximum number of simultaneously allowed sessions. When a session of a
given type is started, an index number running from zero to this number
minus one will be passed to the Python code. The code should use this
number to ensure that each session uses non-conflicting resources (e.g.
port numbers, node allocations, graphics cards, etc).
Additional pieces of data can be passed via the "options" object. The
option dictionary is passed to the RemoteServiceScript creation method
as 'common_options' and by default is stored as the _common_options
attribute on the RemoteServiceScript subclass instance. The user is
encouraged to add any customization options to this dictionary.
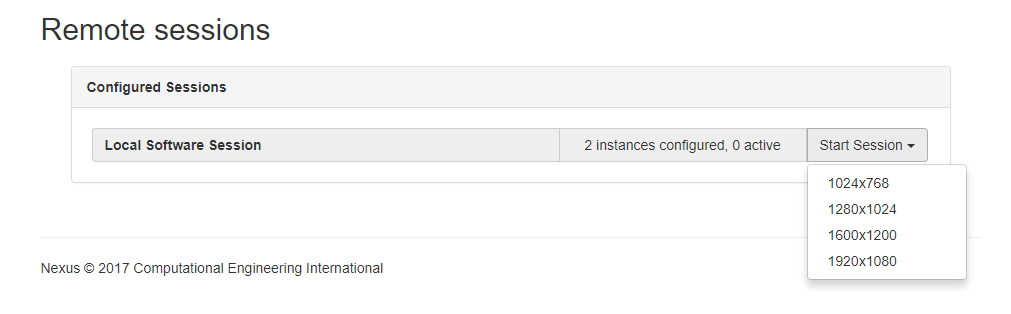
The Nexus system uses two keys to configure the HTML page it presents for selecting sessions. The first is 'sizes'. This should be a list of strings that are displayed in the pulldown menu used to start the session. It defaults to a list of common window sizes.
The value selected for sizes is passed in the "options" dictionary to
the RemoteServiceScript.start() method.
The Nexus system will also look for the "group" key in the options dictionary. In the example above, this key has been set to the value "ClusterRendering" for instances of the "Cluster Node Session" session type. If the "group" key is set to the name of a Nexus administration group, the session type will only be made available to users who are members of that specific group. In the example, if you are not a member of the "ClusterRendering" group, you will not be allowed to create "Cluster Node Session" sessions.
Session Lifecycle Python Script#
The "script" file is responsible for actually created and deleting a session. It takes the form of a Python script that creates instances of the core session lifecycle class. Taking a deeper look at the file "desktop_session.py" (which should be located in the same directory as the configuration JSON formatted file):
# Simple example remote service. The loader will call a method to
# realize the services associated with a specific service name.
# All services must subclass RemoteServiceScript.

from nexus_remote_service import RemoteServiceScript
import subprocess
import time

# Launch a vnc server (tightvnc) and run an optional command in the token json map file

class SimpleVNC(RemoteServiceScript):

   def __init__(self, *args, **kwargs):
      super(SimpleVNC, self).__init__(*args, **kwargs)

   def display_base(self):
      return self._common_options.get("display_base", 100)

   def start(self, token, timestamp=time.time(), options=dict()):
      username = options.get('username', '')
      size = options.get('size', '1600x1200')
      cmd = ["vncserver", "-depth", "24", "-geometry", size, ":"+str(self.display_base()+self._index)]
      try:
         print("SimpleVNC start: {} {}".format(self, cmd))
         code = subprocess.call(cmd)
         if code != 0:
            return False
      except:
         return False
      self.set_host_port("localhost", 5900+self._index+self.display_base())
      return super(SimpleVNC, self).start(token, timestamp=timestamp, options=options)

   def stop(self):
      cmd = ["vncserver", "-kill", ":"+str(self.display_base()+self._index)]
      try:
         print("SimpleVNC stop: {} {}".format(self, cmd))
         code = subprocess.call(cmd)
      except:
         pass
      return super(SimpleVNC, self).stop()

def realize_service(name="", count=1, index=0, common_options=dict()):
   print("Realizing SimpleVNC service: {} {} {} {}".format(name, count, index, common_options))
   return SimpleVNC(name, count=count, index=index, common_options=common_options)
realize_service() Startup function#
The Nexus core will import this file and call the function
realize_service() with information gleaned from the JSON
configuration file. The name will be the session type name (the top
level key in the JSON file). The count and common_options keyword values
will also have come directly from the JSON file, "count" and "option"
keys respectively. realize_service() will be called once for each of
the instances that may be legal. This for count=3, it will be called
with index=0, index=1 and index=2. realize_service() must respond
with an instance of a subclass of the RemoteServiceScript class.
This subclass must at least implement the start() and stop()
methods. All other methods are optional.
RemoteServiceScript.start() Method#
The start() method is called when a session has been authorized,
authenticated and is ready to begin (e.g. an upstream entity has
requested data over a websocket). In the example, the start() method
creates an instance of 'vncserver' using the 'size' option selected in
the Nexus web page. It also selects a port number using a base port
number specified in the JSON configuration file and the index of this
session instance. In a production environment, it can use the
authenticated/authorized 'username' from Nexus to select a user target
for the session. The start() method must call set_host_port() to
set the hostname and port over which the processes it created (vncserver
in this example) will be accepting VNC connections. The Nexus system
will automatically tunnel this port over the websocket interface and
apply any selected SSL encryption to the stream. If the operation fails,
the function must return False.
RemoteServiceScript.stop() Method#
The stop() method is called after all active connections to a
specific session instance have closed their connections (e.g. the
browser or the specific tab is closed). It can also timeout. It will
only be called if start() had previously been called. In our
example, it simply calls vncserver -kill with the proper port
specification for the instance.
Notes and Limitations#
The Remote Session system works by the Nexus core providing authentication and authorization. From that information, it generates a private cookie for the allocated session and serves these up via REST from the websocketserver.
The system works by Ansys Dynamic Reporting generating a web page with an embedded URL containing the private cookie. This cookie is passed to the websocketserver service when the JavaScript VNC server is realized. Thus, care should be taken to ensure that the transmission of the web page be protected by encryption. In order for the system to be secure, it is strongly recommended that SSL be used to access the NGINX server for all browser connections. The Nexus server will honor this encryption.
See the Known issues & limitations section for additional notes.