Layout: Slider#
The slider layout is used to show a collection of image items under user control. It displays a single image item with an optional title under the image. Beneath that are one or more sliders that allow the user to select between the various images. An example is shown below:
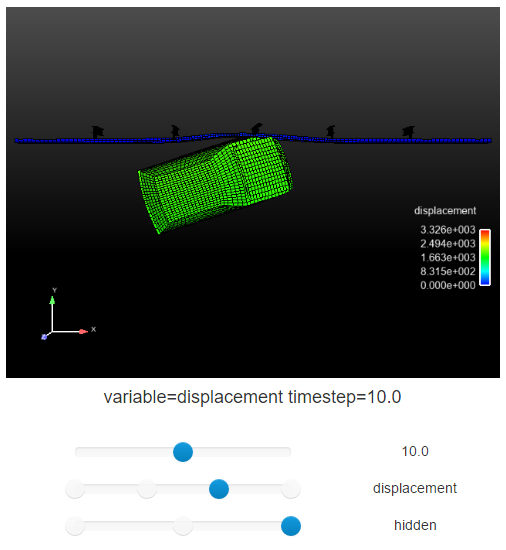
The slider template first selects the image items to be displayed. Note: it is not necessary to filter in incoming data item list to the image type, that part of the filtering is implicit. It then uses tag values to sort the images into "dimensions" based on the tags. It will generate one slider per dimension (tag) and the number of positions of that slider will be equal to the number of values that tag can have. In the example above, there are three tags: 'timestep', 'variable' and 'mode'. The first is a number, the second the name of a variable and the third a simple string. These names are set in the configuration options as shown below.
Each of the tags is represented using a slider. The user selects a value from each slider and the title (below the image) and the values to the right of the sliders update to reflect the new settings. The representative image is fetched from the ADR Nexus server and displayed. If a set of tags selects more than one image (in the example, if more that one image has the same 'timestep', 'variable' and 'mode' tags), an extra slider will be added automatically at the bottom of the sliders to allow the user to view all of those images. The visibility of this slider is dynamic, based on the number of images at the current set of tag values. There is a property (first_image_only) that will select only the first image be displayed and no extra slider be displayed.
There is an option to map clicking on the image and dragging in the X and Y axes to perform the same operation as dragging tag sliders. The X and Y axes can be independently linked to a specific tag and instead of displaying a slider for those tag(s), the user can select the image by clicking and dragging. This can be used to simulate motion through time, clip plane position or even rotation over the screen axes. There are three properties that control this function (they are duplicated for the x and y axes). The 'slider_xaxis_tag' property should be set to the name of the tag that is mapped to the x axis. Note: if this property is set, no slider will be displayed for that tag. By default, drag motion is set so that a drag over the entire image axis will result in the entire domain of that tag. For example, if there are 10 different values for the tag and the image is 500 pixels wide, then dragging the mouse 50 pixels will increment/decrement the tag value one step, depending on the direction of the drag. The 'slider_xaxis_scale' property (default: 1.0) will let one change the relative number of pixels of motion needed. In the previous example, with the 'slider_xaxis_scale' set to 2.0, dragging the mouse 25 pixels will change the tag one step. One hint, it is often useful to set the scaling factors taking into the aspect ratio of the image into account. This helps ensure that the same amount of motion in each axis as a similar effect, very useful when trying to simulate things like 3D rotation. Finally, the 'slider_xaxis_clamp' property determines what happens when relative motion in the image window causes the tag value to increment/decrement beyond the number of items in the tag domain. By default ('slider_xaxis_clamp' defaults to 0), the tag value will "wrap around", conceptually to the opposite end of the slider. This can be very useful for periodic sequences (e.g. 360 degree rotations). Setting this property to 1 causes the tag value to "clamp" the values to the first/last positions. This can be desirable for things like non-periodic time sequences.
An image set in a slider can be made of images of 2 types:
Simple PNG image
These are simple images with the .png extension that can be generated from EnSight or uploaded by the user.
Deep/Enhanced image
These are TIFF images with the .tif extension that can only be generated from EnSight by turning on enhanced mode during generation.
Image sets can only be simple or deep but cannot be a combination of both.
Enhanced images also known as 'deep images' are a step beyond plain PNG images and are rich with information.
They contain 3 layers of information:
The color layer
Contains the R-G-B colors like a basic PNG image. This layer is what is initially visible.
The part layer
Contains information on parts in each pixel of the image. Sometimes these could be hidden parts.
The variable-value layer
Contains information on the variable and its corresponding value for each part. Sometimes, these could be values for hidden parts.
EnSight has the option to generate 'enhanced images' which contain the above information. Once you've used EnSight to generate a collection of such images, you can then create a slider layout with them using the Template Editor. Ansys Dynamic Reporting then automatically recognizes the image's format and makes the appropriate features available in the Slider Layout based on the format.